Secure Remote Access with Twingate
This phase guides you through setting up secure remote access to your Raspberry Pi using Twingate, without exposing your home network to the public internet.
After completing this phase, you’ll be able to safely access your
Raspberry Pi and network resources from anywhere in the world.
👇👇👇👇👇
PHASE_5_START
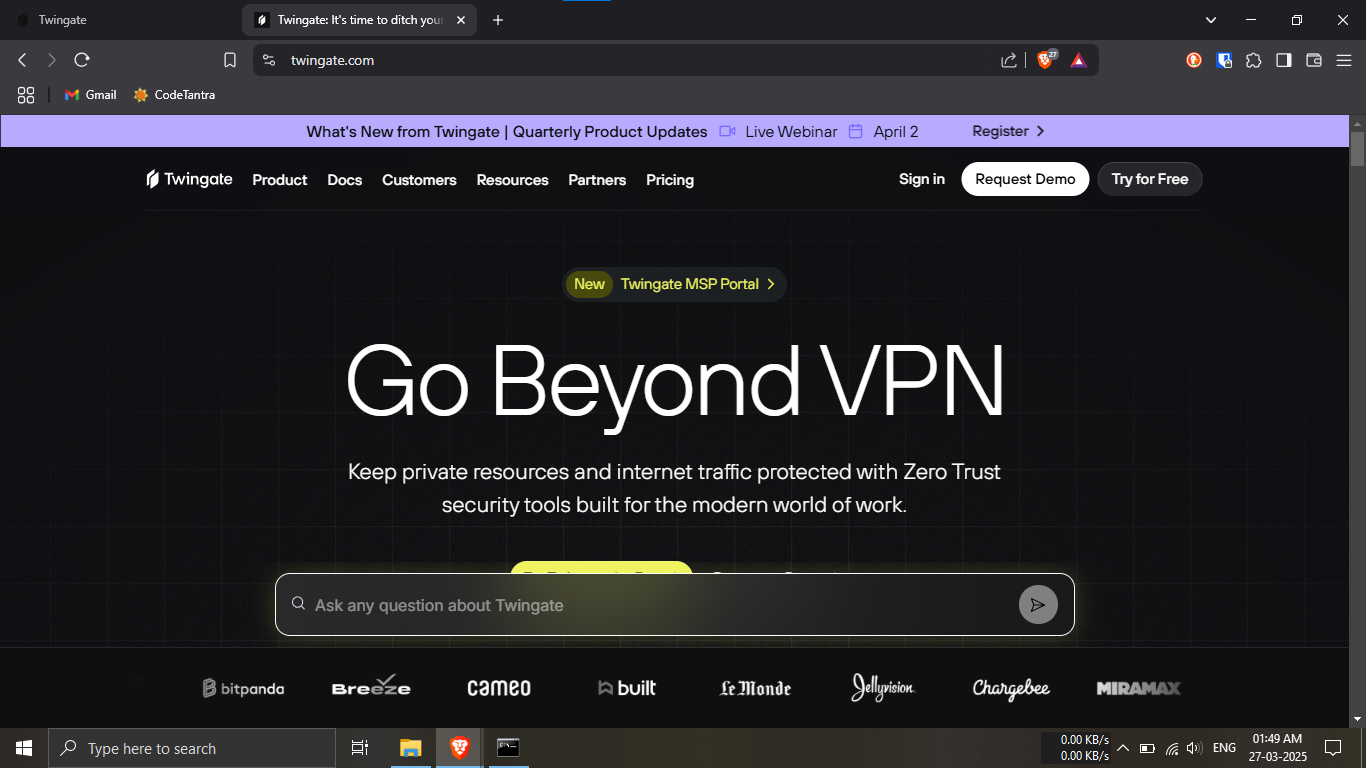
Step 25.1: Visit the official
Twingate website.
🔹Breakdown:
-----Open your preferred browser.
-----Navigate to: https://www.twingate.com
💡 We’ll use Twingate to help securely access your home
network remotely!
Step 25.2: Begin creating your Twingate network.
🔹Breakdown:
-----Scroll down to the bottom of the page.
-----Click on the link:
"Create a new Twingate Network"
💡 This starts the setup process for building your
secure network.
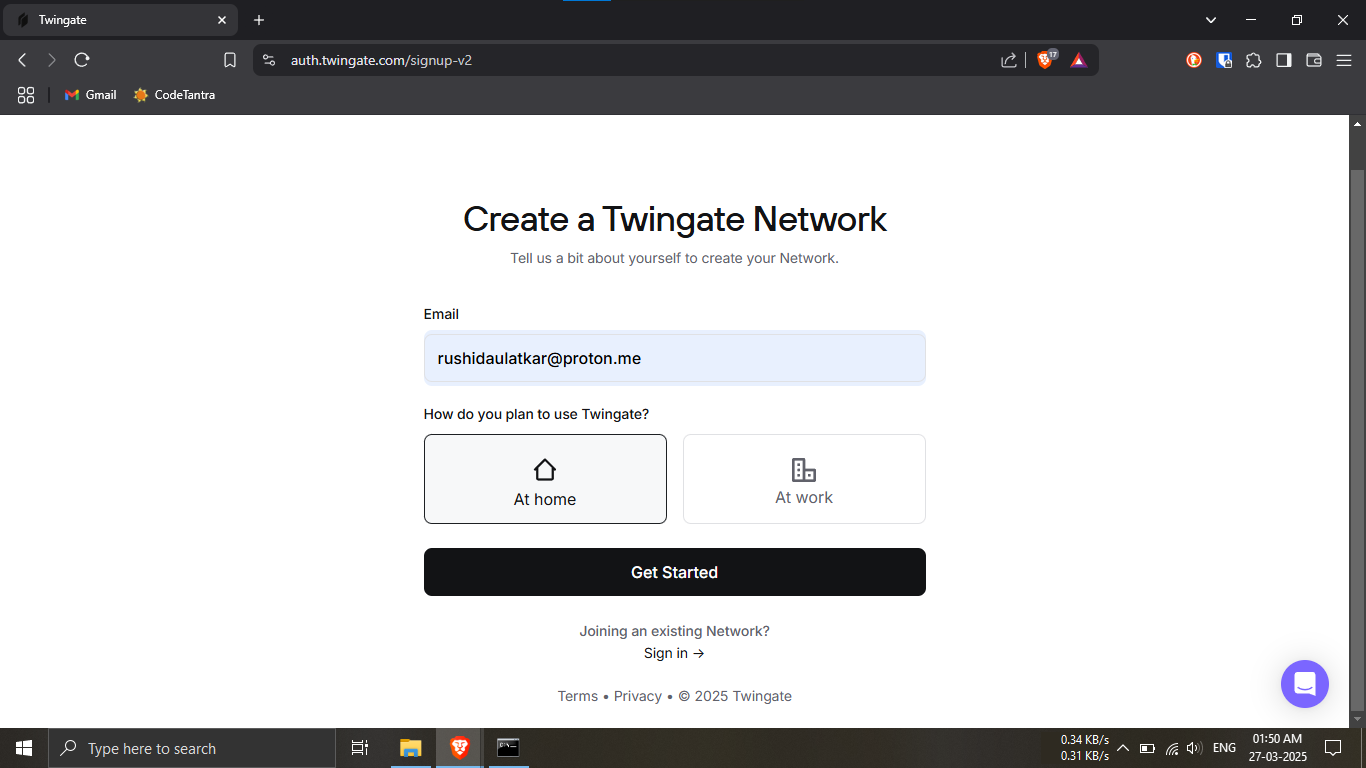
Step 25.3: Enter your email and setup preferences.
🔹Breakdown:
-----Type in your email address in the field
provided.
-----Under the question
"How do you plan to use Twingate?", select:
Home
-----Click the “Get Started” button.
💡 This helps personalize your setup for home use.
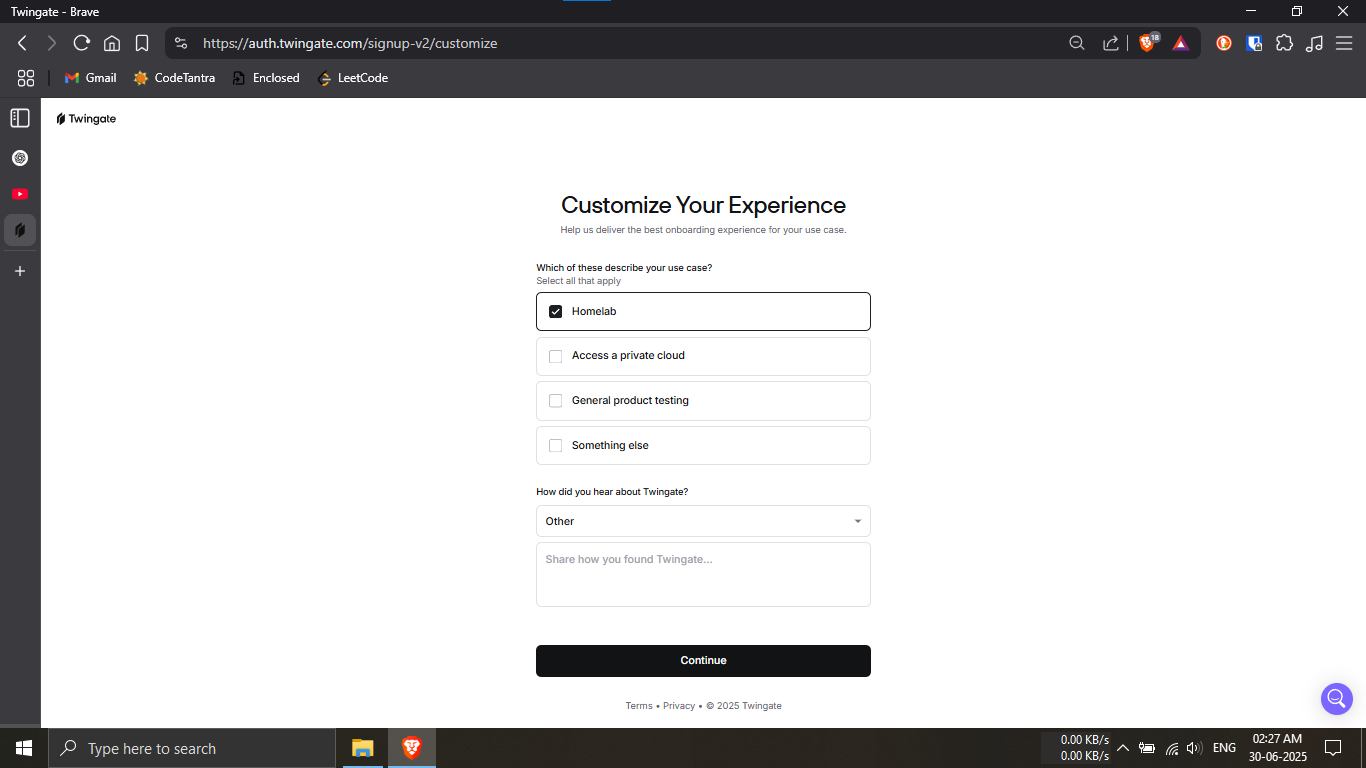
Step 25.4: Choose your use case and survey options.
🔹Breakdown:
-----For the question
"Which of these describe your use case?", select:
Homelab
-----For the question
"How did you hear about Twingate?", select:
Other
-----Click the “Continue” button.
💡 These selections help Twingate tailor your
onboarding.
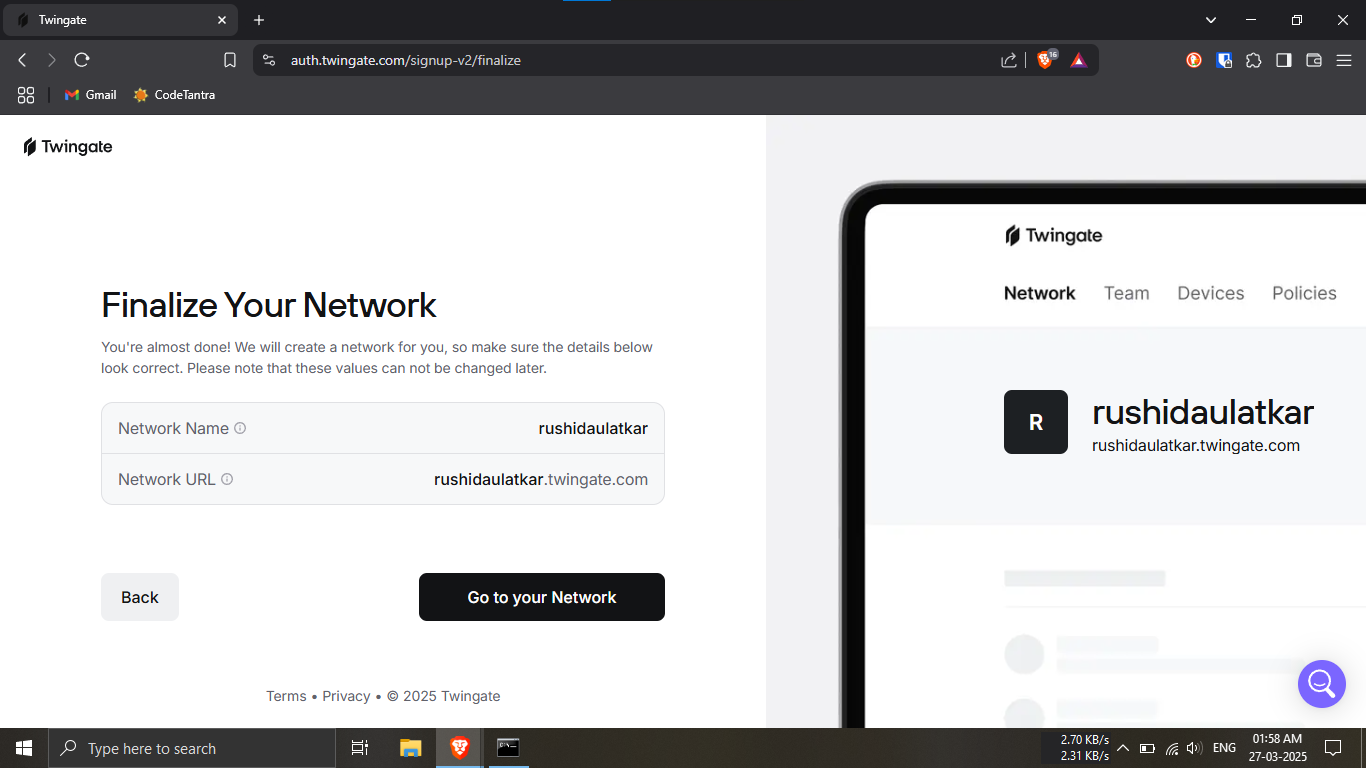
Step 25.5: Finalize your network details.
🔹Breakdown:
-----Enter a Network Name and
Network URL.
💡 To keep things simple, use the same name for both
fields (e.g., mynetwork).
✅ This makes access and identification easier later.

Step 25.6: Choose a sign-in method.
🔹Breakdown:
-----Select any available sign-in method (Google ,
Microsoft , Github , LinkedIn etc.).
-----Make sure to use the same email address you
entered earlier for Twingate.
💡 Using the same email simplifies authentication and
reduces potential issues.
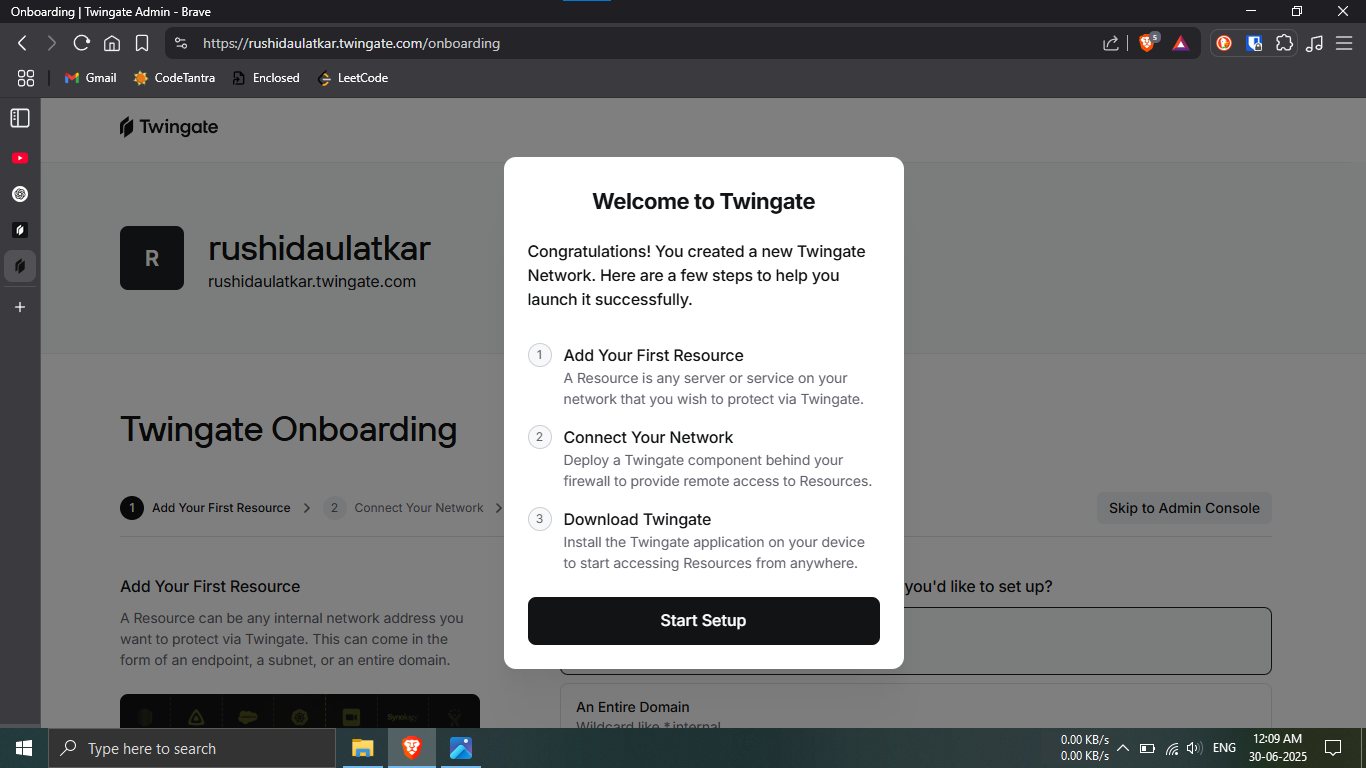
Step 25.7: Your account has been created!
🔹Breakdown:
-----You’ll see a success screen confirming account
creation.
-----Click the button “Start Setup” to begin
configuring your secure network.
🎉 You're now ready to connect Twingate with your
Raspberry Pi NAS!
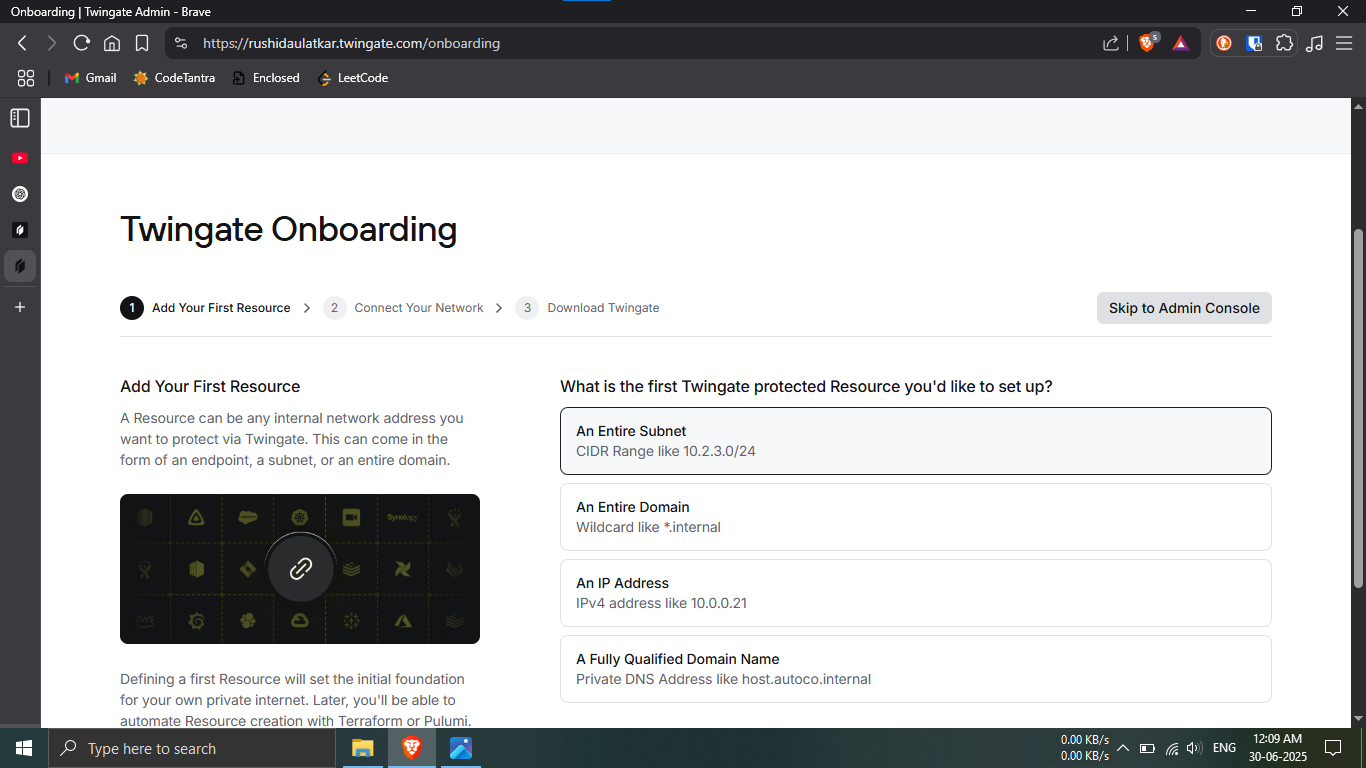
Step 26.1: Access the Admin Console.
🔹Breakdown:
-----On the Twingate onboarding page, locate the option
to skip.
-----Click "Skip to Admin Console" to bypass
guided onboarding.
💡 This takes you directly to the dashboard for manual
configuration.
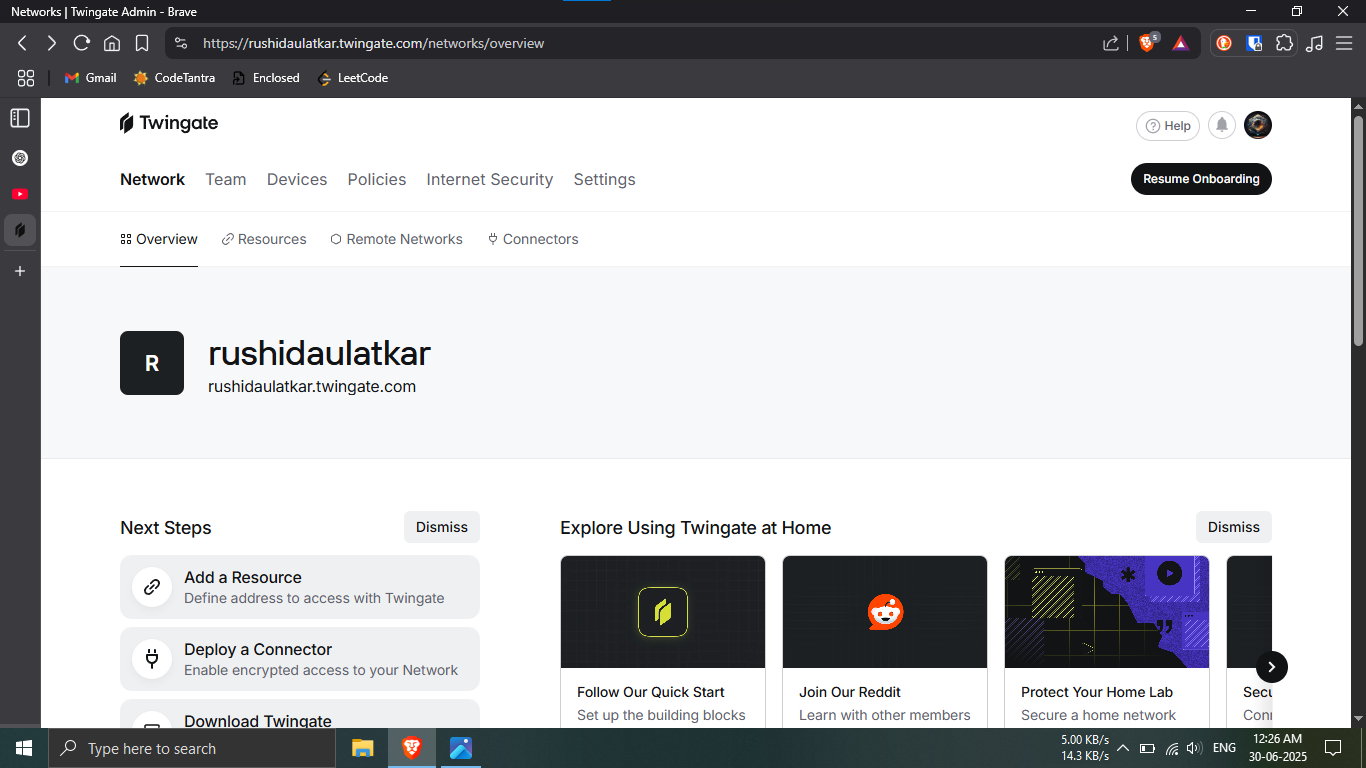
Step 26.2: Open the Remote Networks section.
🔹Breakdown:
-----You should now be on the Overview page of
the Admin Console.
-----Click on the top navigation tab labeled
"Remote Networks".
💡 This section is where you manage secured network
locations.
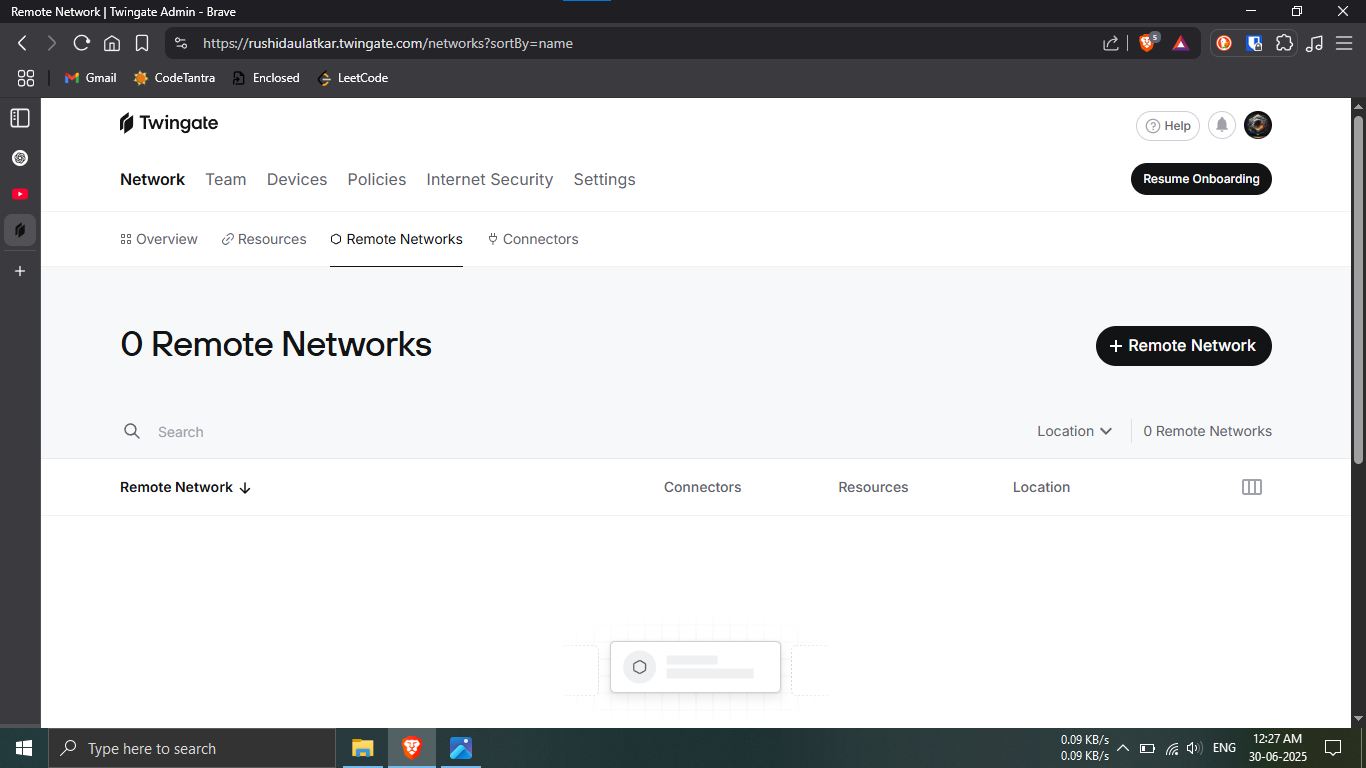
Step 26.3: Add a new Remote Network.
🔹Breakdown:
-----In the Remote Networks page, click on the
"+ Remote Network" button.
💡 You’ll now begin setting up a new location for remote
access.
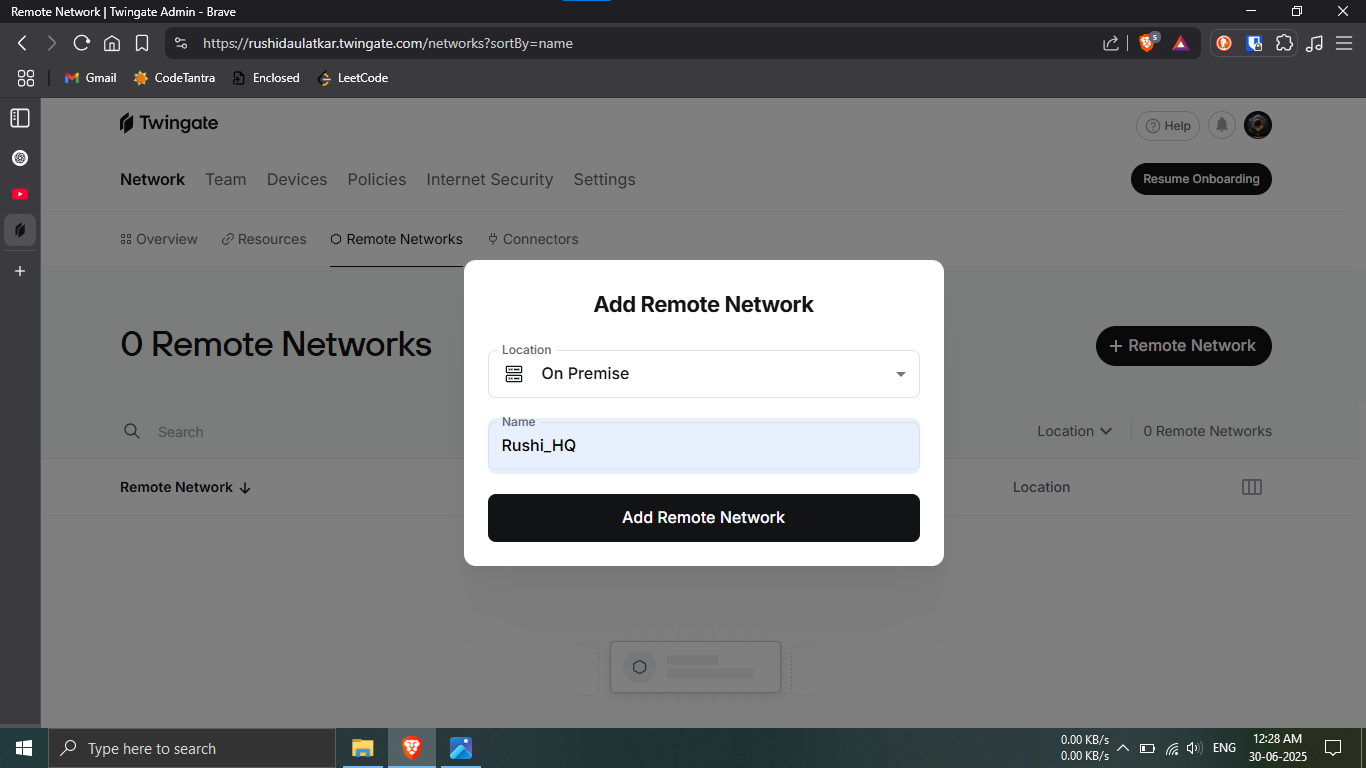
Step 26.4: Configure your new Remote Network.
🔹Breakdown:
-----In the popup that appears, choose
"On Premise" as the location type.
-----Name your Remote Network — e.g.,
Rushi_HQ.
💡 Give it a clear, recognizable name so you can
identify it easily later.
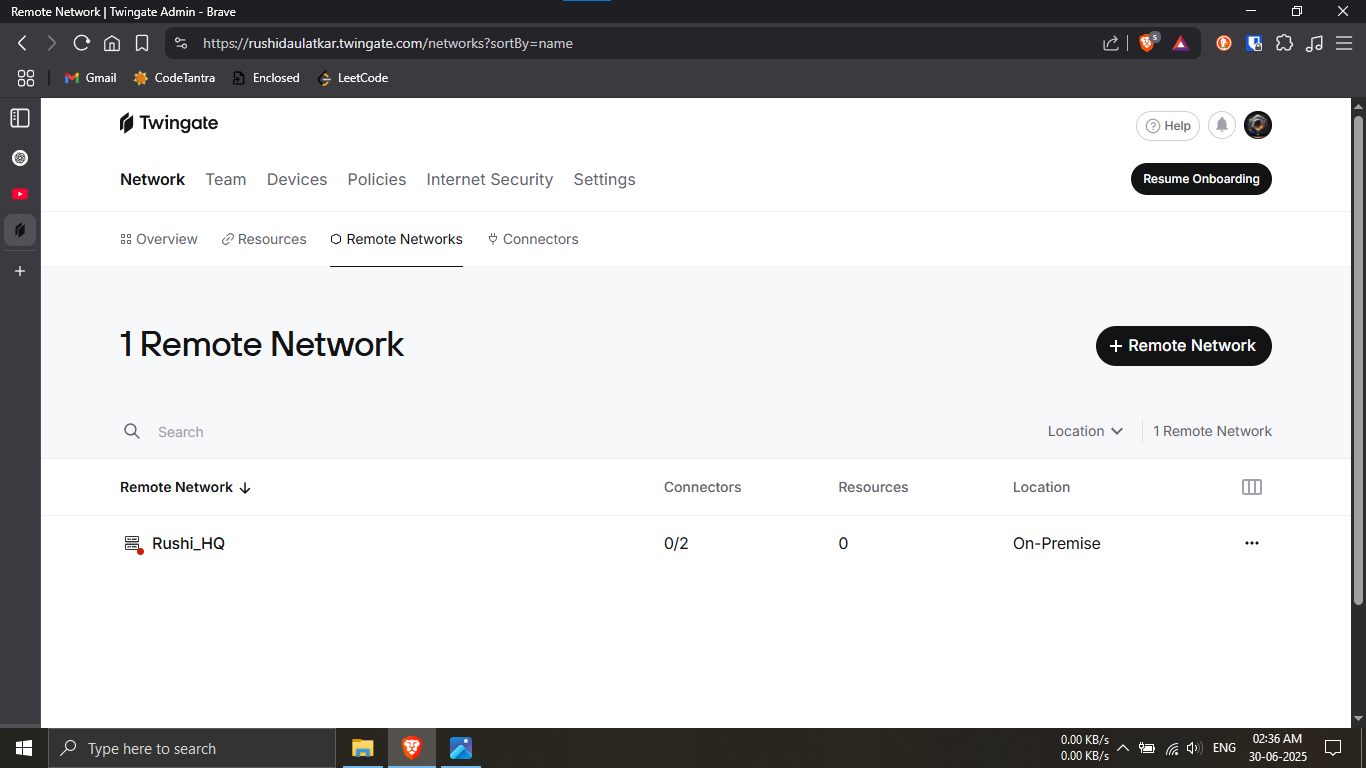
Step 26.5: Verify your new Remote Network.
🔹Breakdown:
-----You should now see a visual list of your created
Remote Networks.
-----It should display key details like:
------✔️ Remote Network Name
------❌ Connector Status
------❌ Resources
------✔️ Location
💡 Make sure your screen looks similar to the example 💡
For now it will be not active. shown. This confirms the
network has been added correctly.
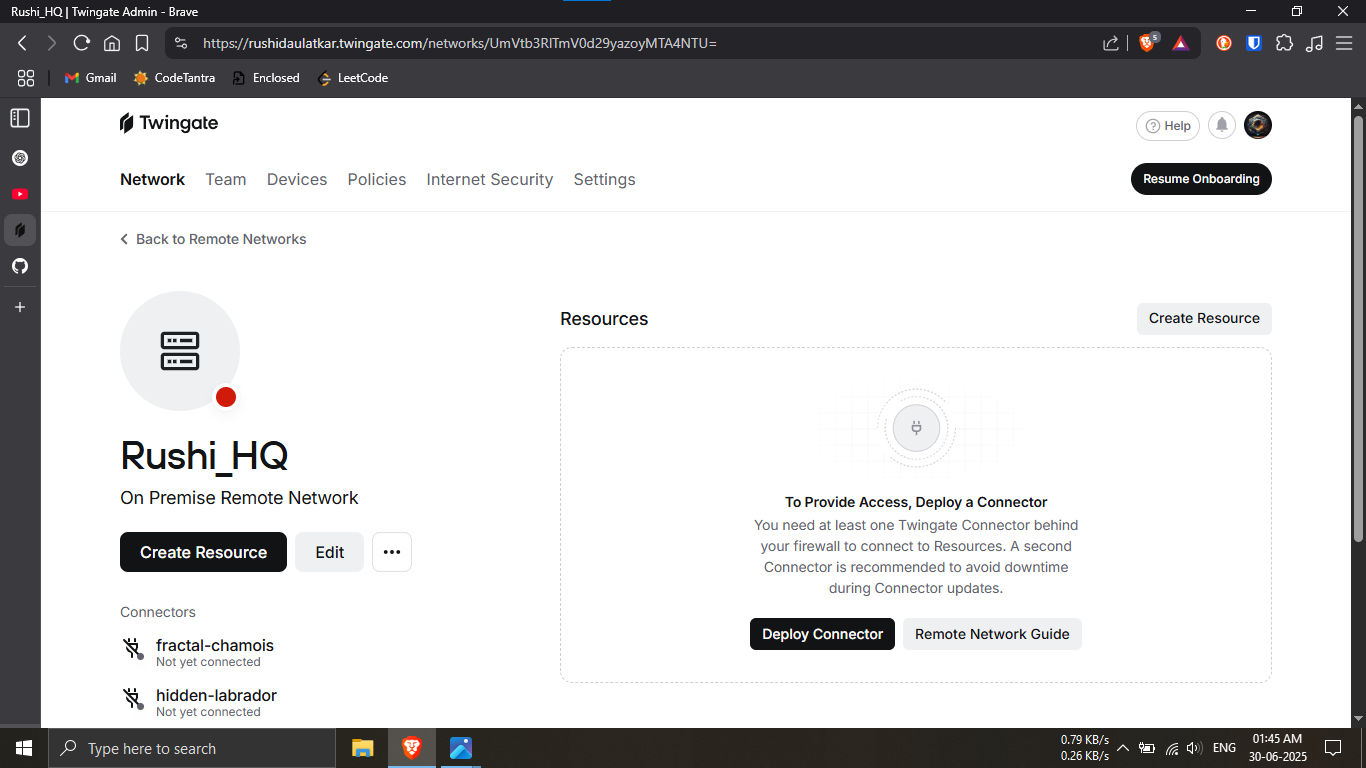
Step 27.1: Begin deploying the connector.
🔹Breakdown:
-----Click on the Remote Network you just created (e.g.,
Rushi_HQ).
-----Then click on the "Deploy Connector" button
to begin setup.
💡 This connector will allow secure access between your
local network and Twingate.
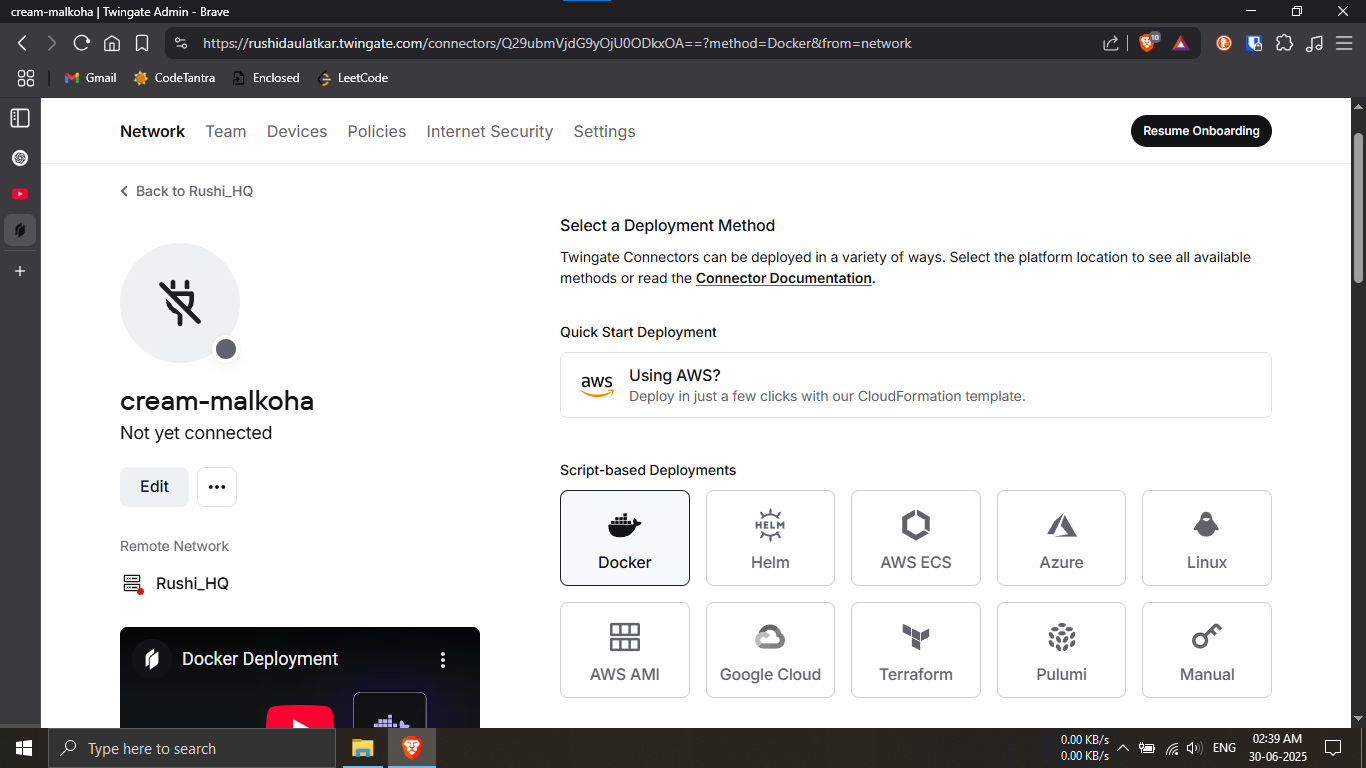
Step 27.2: Choose deployment method via Docker.
🔹Breakdown:
-----On the deployment options screen, look for
"Script Based Deployments".
-----Click on the Docker icon or the option
labeled Docker.
-----Scroll down to continue with the setup steps.
💡 Docker is a reliable and quick method for deploying
Twingate connectors.
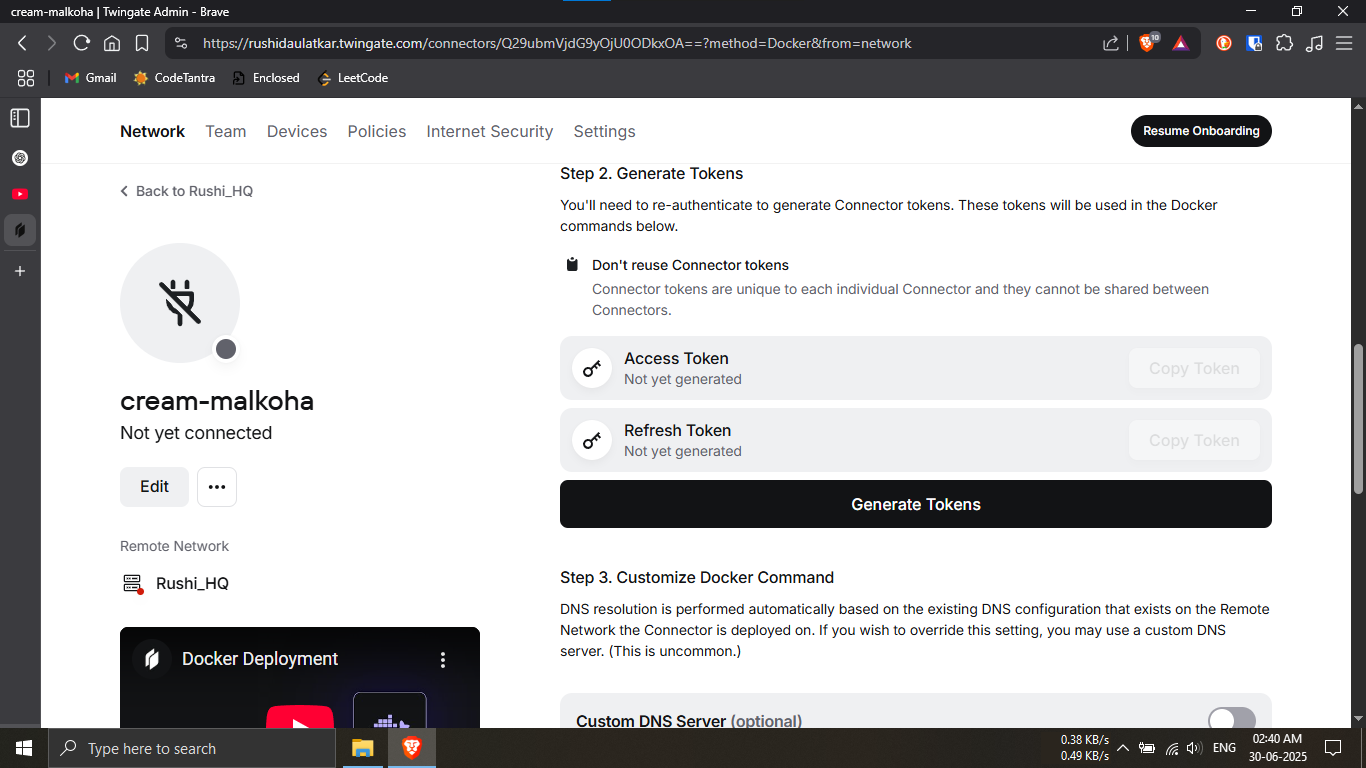
Step 27.3: Generate connector authentication tokens.
🔹Breakdown:
-----Locate the "Generate Tokens" section.
-----Click the "Generate Tokens" button.
-----Wait for a few seconds while your secure tokens are
created.
🛑 Important: Do not share these tokens with
anyone. They are sensitive and should be kept private!
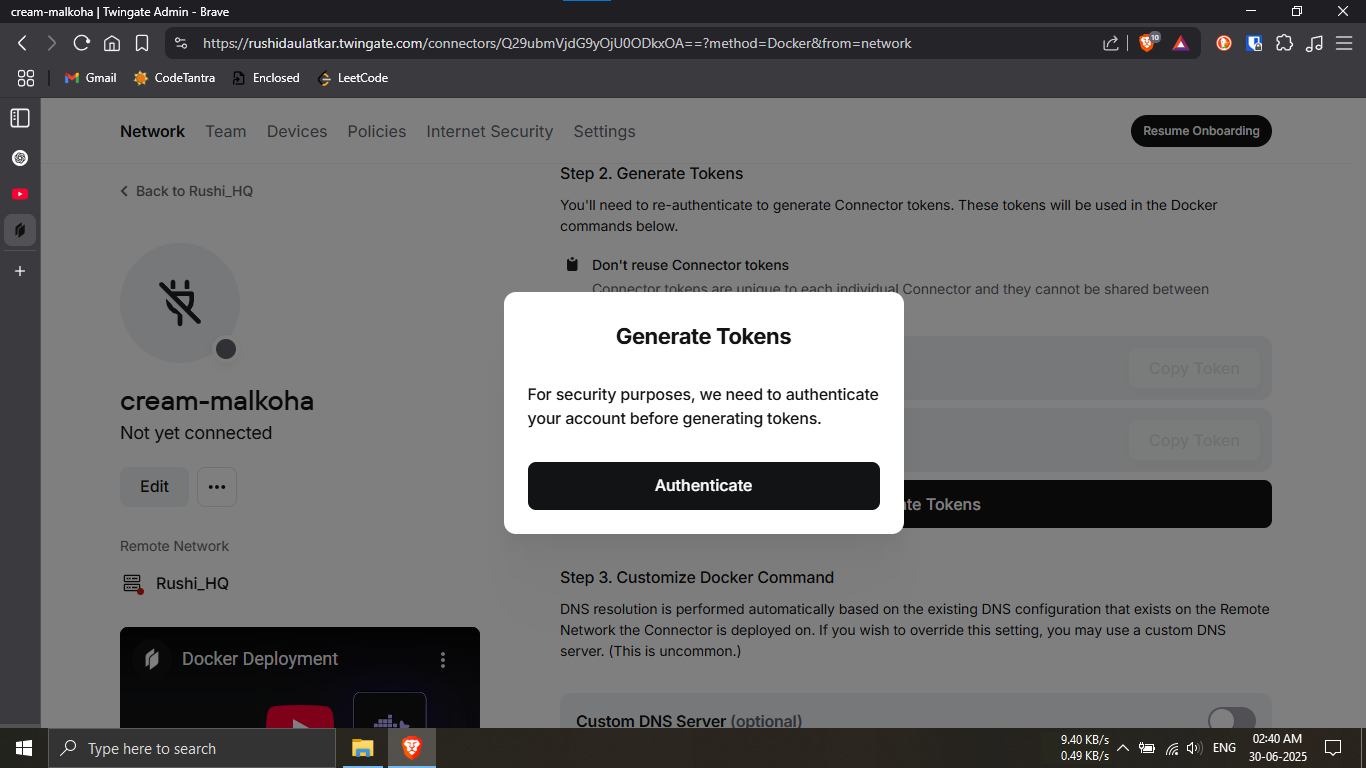
Step 27.4: Authenticate if prompted.
🔹Breakdown:
-----If you're asked to authenticate before generating
or using tokens,
-----Click on the "Authenticate" button and
proceed with verification.
🔒 This is a one-time secure check to ensure only
authorized users can proceed.
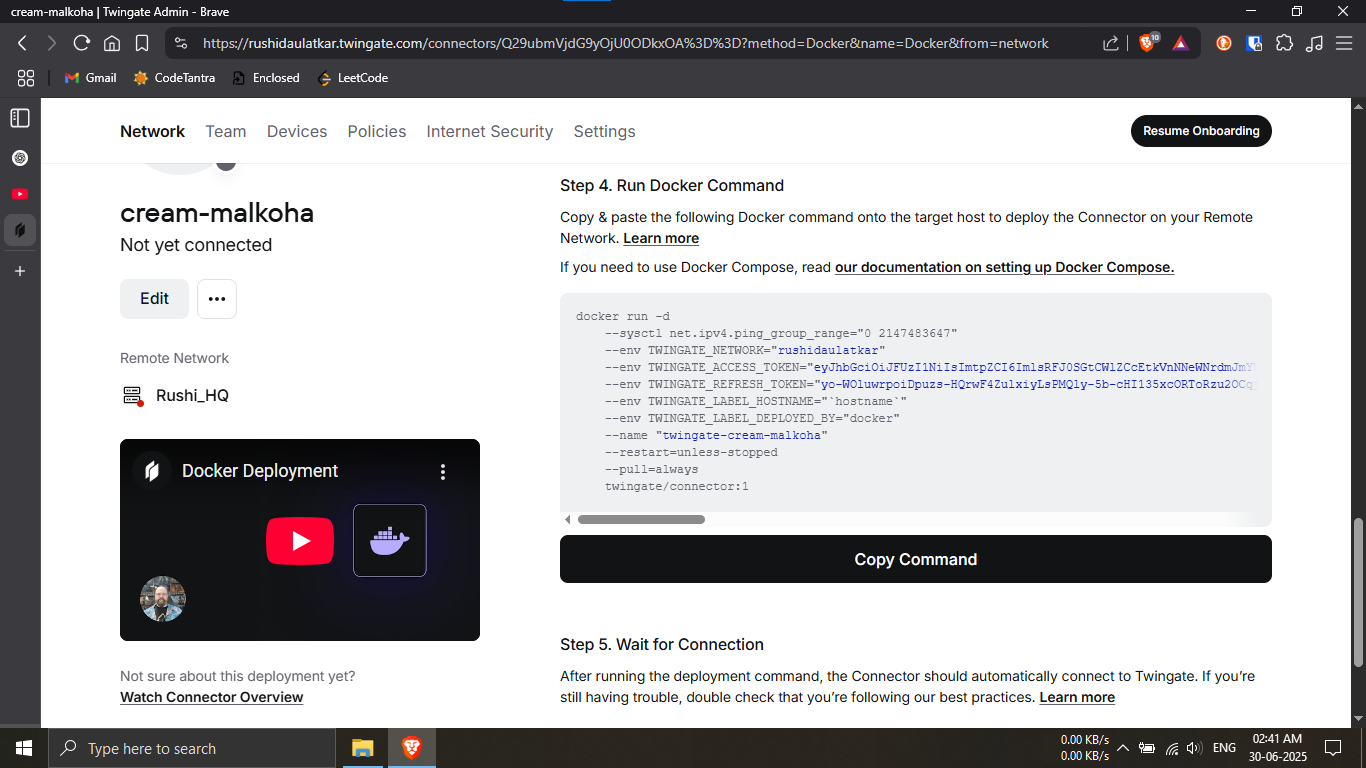
Step 27.5: Copy the deployment command.
🔹Breakdown:
-----Scroll down until you see a block of auto-generated
Docker commands.
-----Click on the "Copy Command" button to copy
the script to your clipboard.
💡 This command will be used on your Raspberry Pi to
deploy the connector.
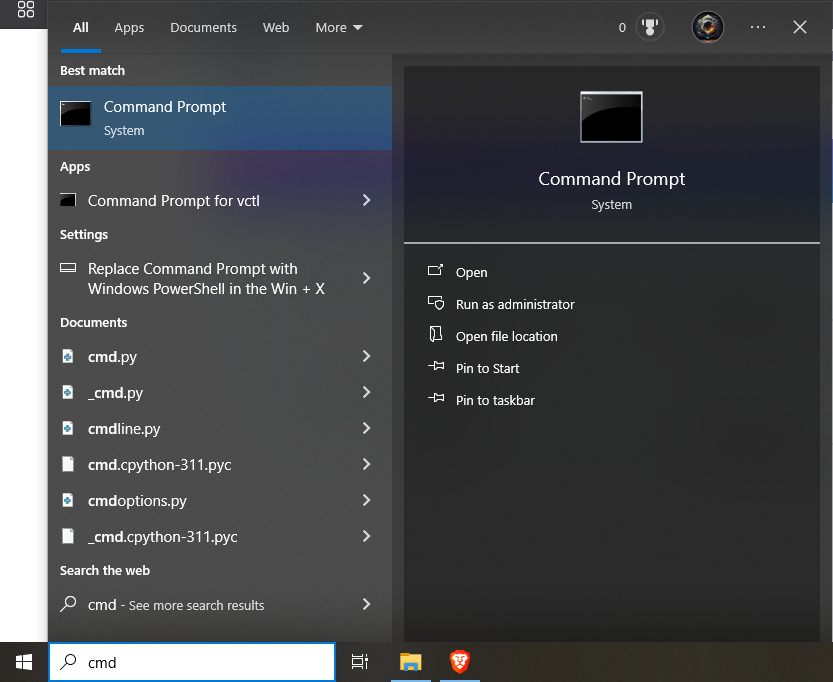
Step 28.1: Click on the Start menu, type cmd, and select Command Prompt from the search results.
Instruction 28.1
Step 28.2: Connect to the Raspberry Pi using SSH.
🔹Breakdown:
-----Open Command Prompt and type
ssh pi@warden, then press
Enter.
-----If prompted, type yes to accept
the host key and enter the Raspberry Pi password.
-----Once authenticated, you will be logged into the
Raspberry Pi terminal successfully.
💡 A successful connection will display the Debian/Linux
welcome message and the
pi@warden:~$ prompt.
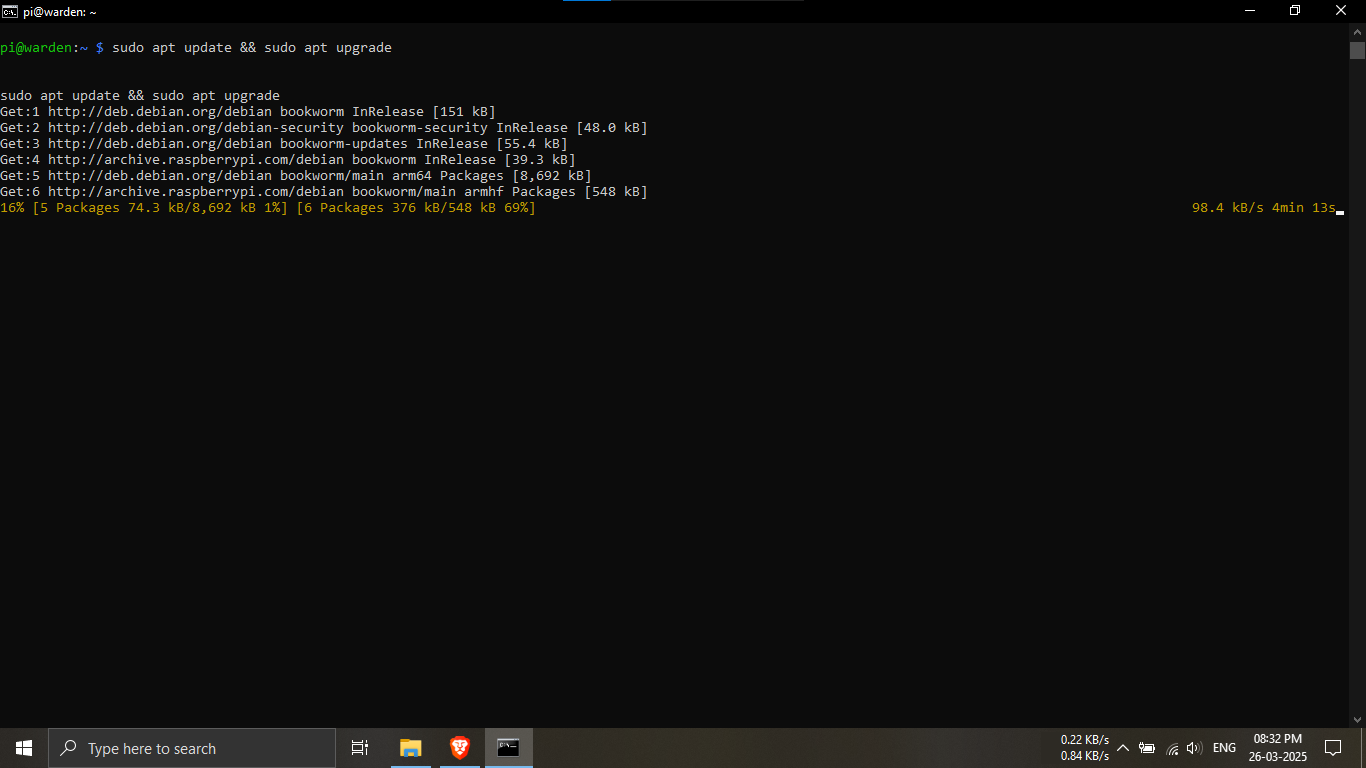
Step 28.3: Update and upgrade the Raspberry Pi system
packages.
🔹Breakdown:
-----Ensure your system is connected to the internet.
-----Run the command below to update package lists and
install available upgrades.
sudo apt update && sudo apt upgrade
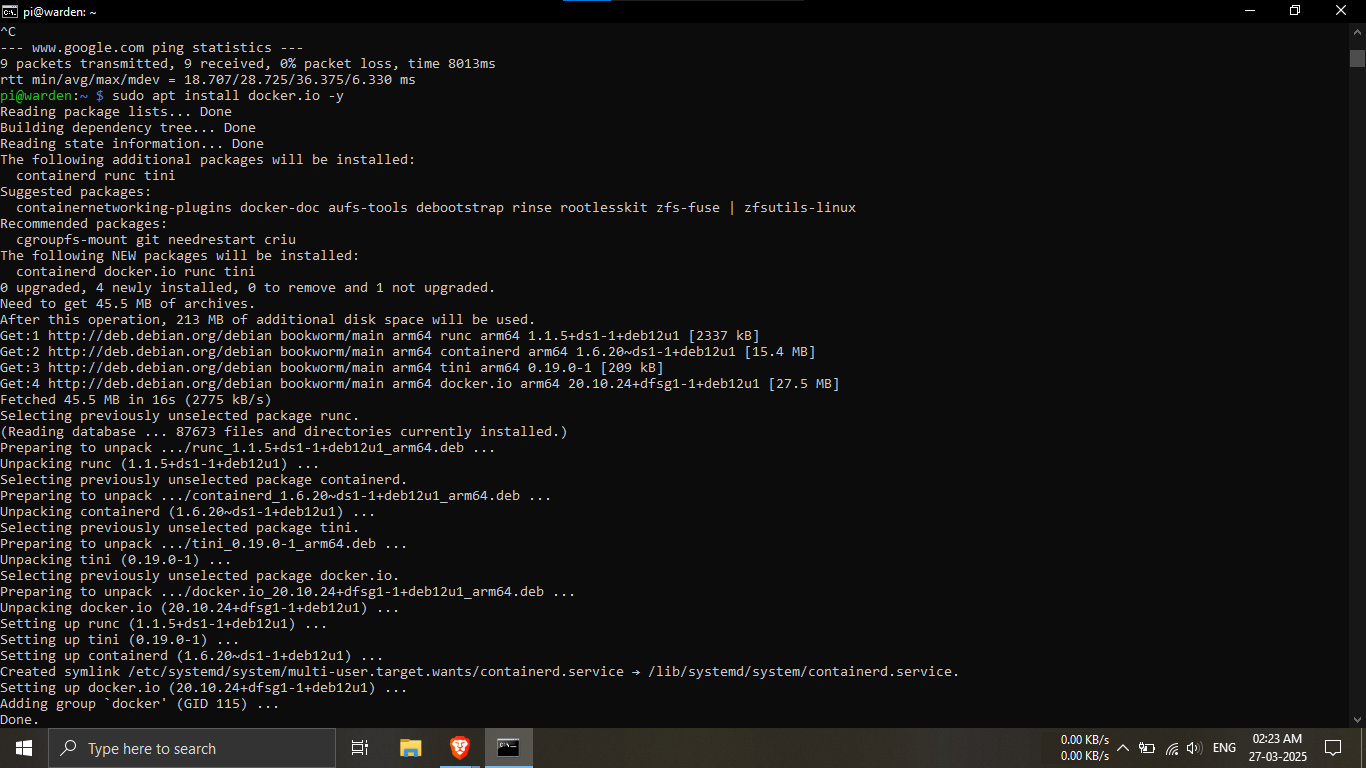
Step 28.4: Install Docker on the Raspberry Pi.
🔹Breakdown:
-----Docker is required to run the Twingate
connector.
-----Use the following command to install Docker and
required components.
sudo apt install docker.io -y
Step 28.5.1: Prepare the system for deploying the
Twingate connector.
🔹Breakdown:
-----Ensure Docker installation completed without
errors.
-----Verify internet connectivity before pulling Docker
images.
💡 This step ensures a smooth Twingate deployment.
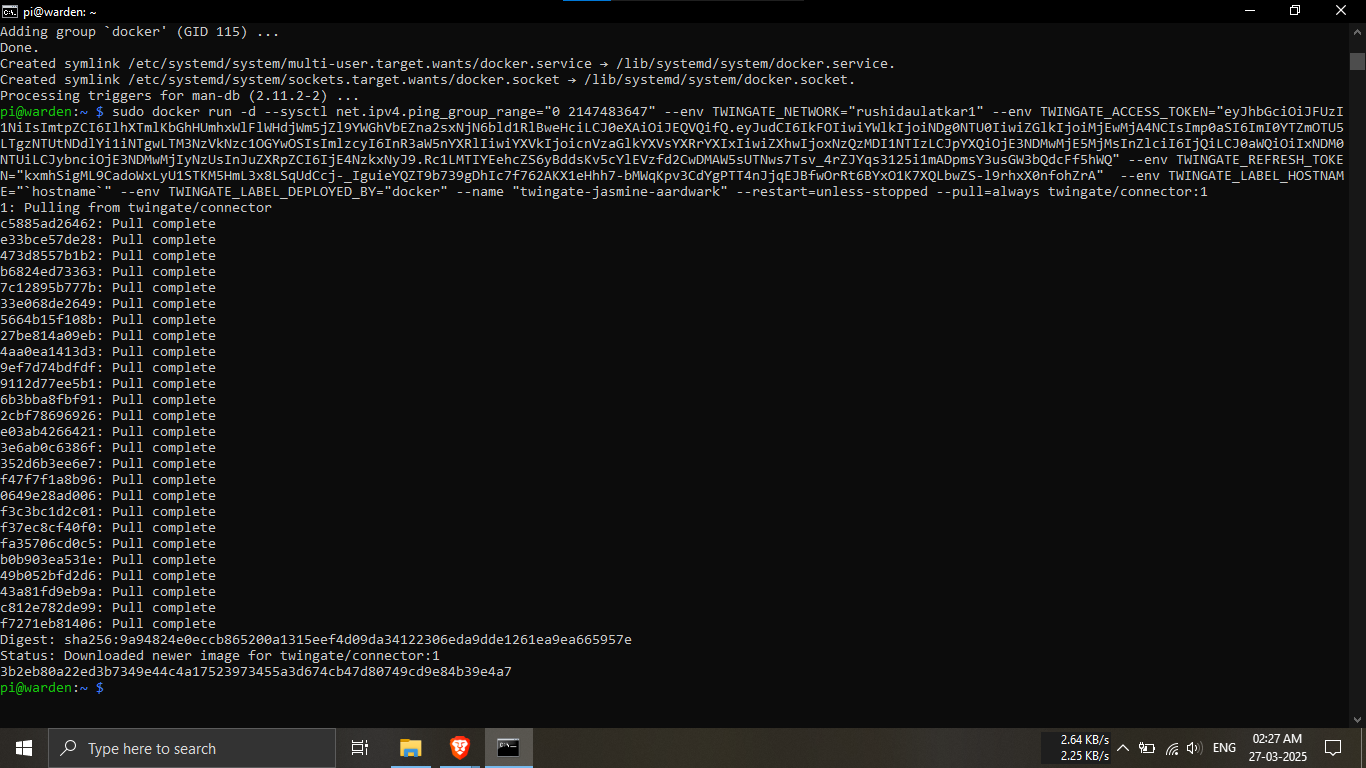
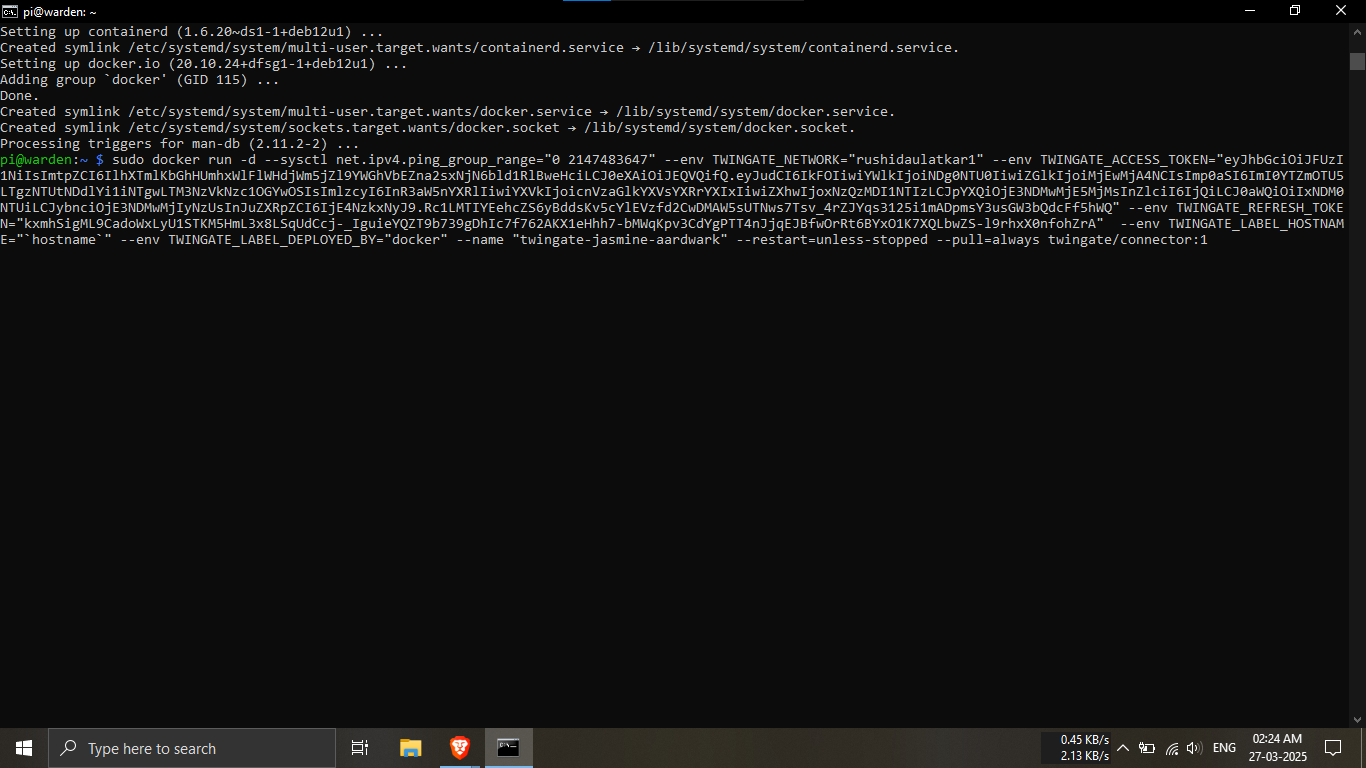
Step 28.5.2: Deploy the Twingate connector using
Docker.
🔹Breakdown:
-----Paste the Twingate-provided Docker command into the
terminal.
-----This command pulls the connector image and runs it
automatically.
-----A successful pull confirms the connector is running
correctly.
sudo + your docker command....
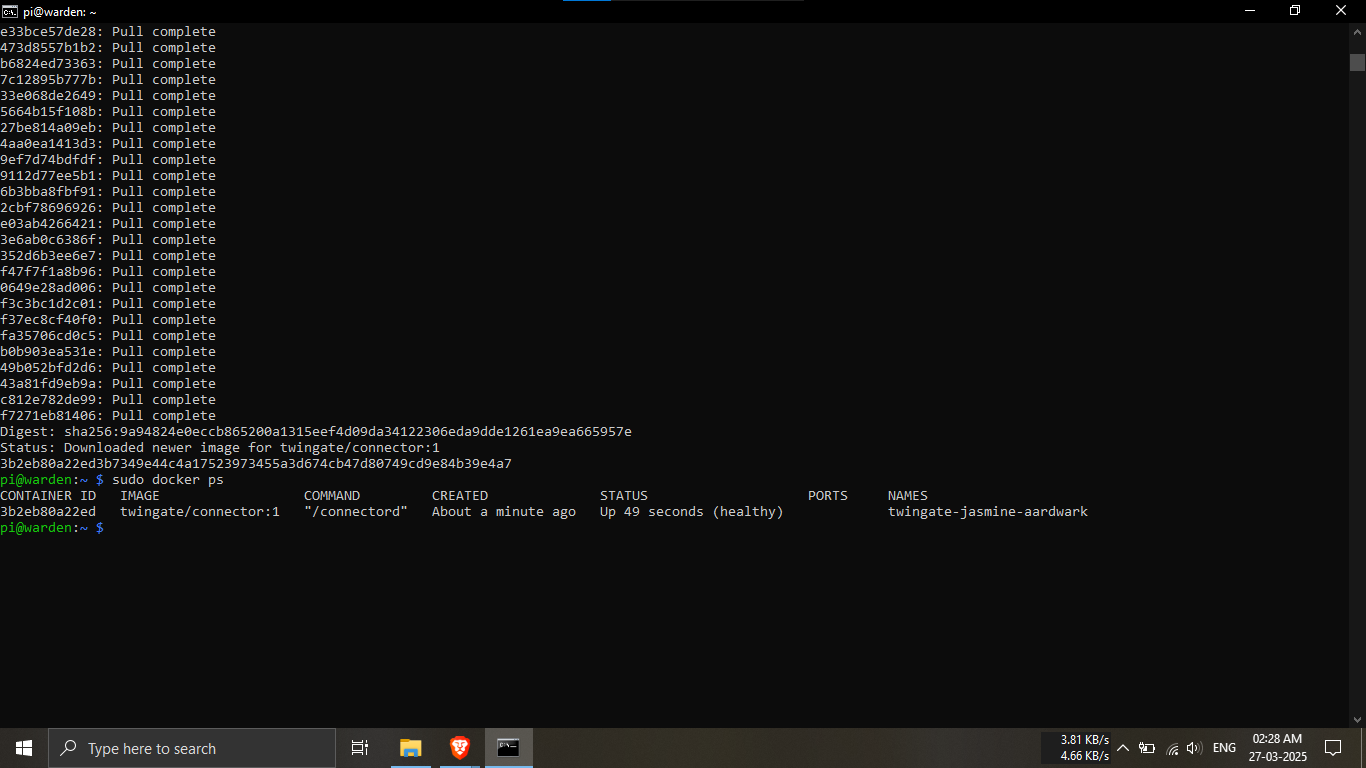
Step 28.6: Verify that the Twingate connector container
is running.
🔹Breakdown:
-----Use the Docker command below to list running
containers.
-----Confirm the Twingate connector shows a
healthy status.
✅ A healthy status confirms a successful deployment.
sudo docker ps
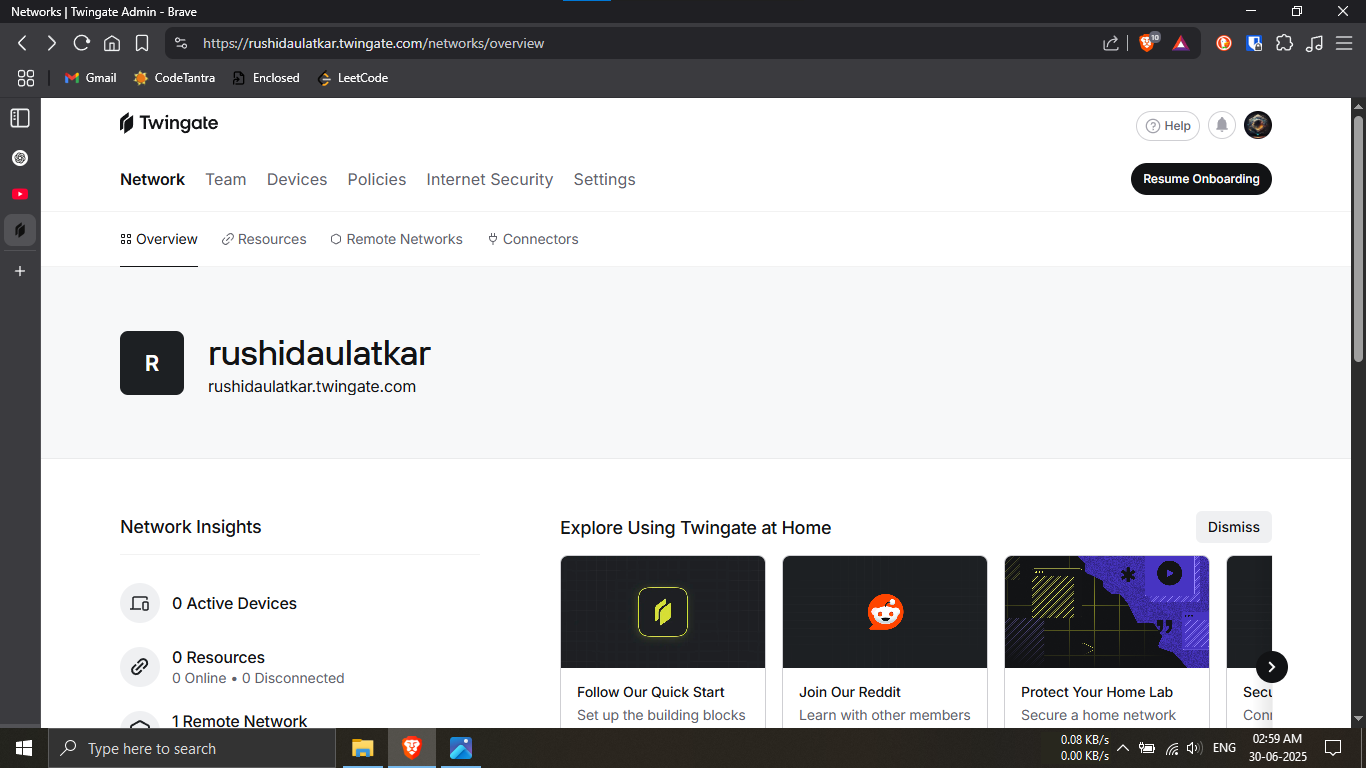
Step 29.1: Open the Twingate Admin Dashboard.
🔹Breakdown:
-----Log in to your Twingate admin account using a web
browser.
-----Navigate to the
Network Overview page to manage your
setup.
💡 This dashboard is used to manage networks, resources,
and access.
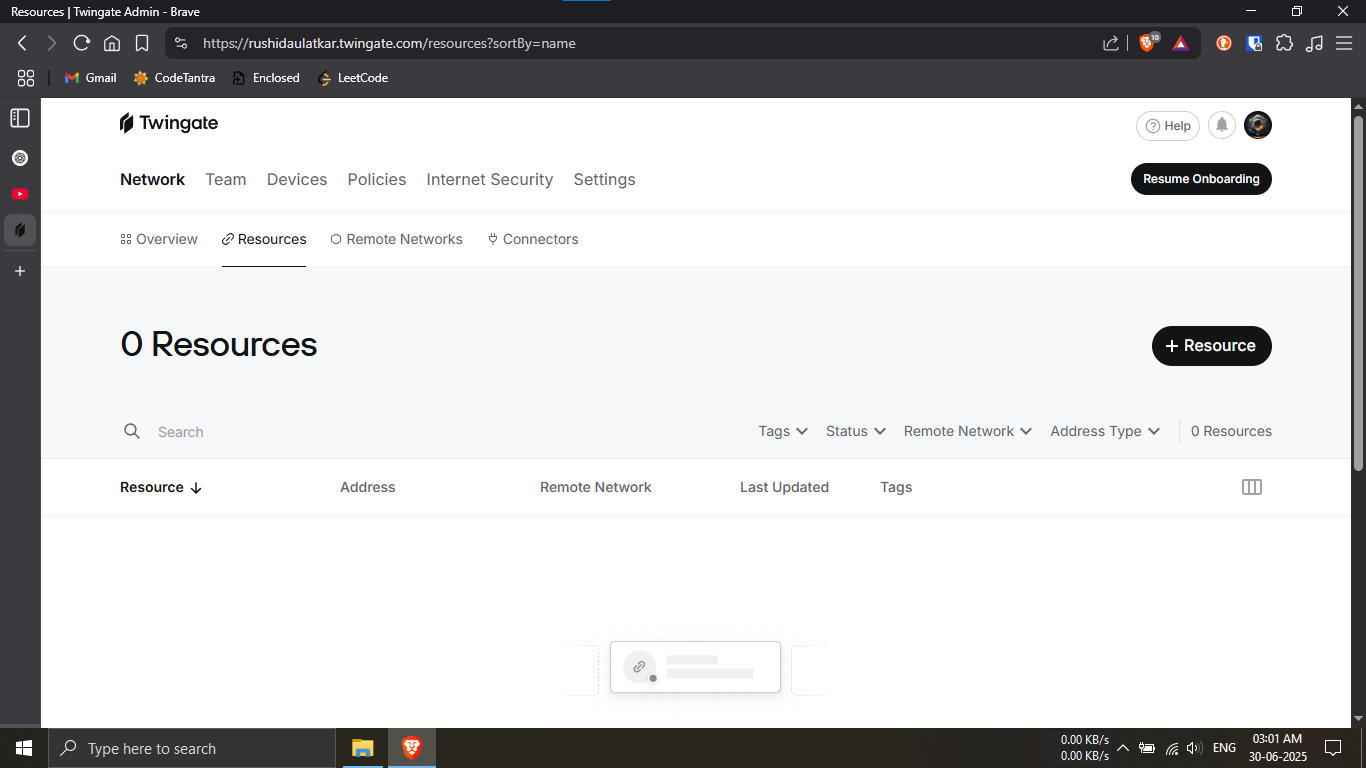
Step 29.2: Navigate to the Resources section in
Twingate.
🔹Breakdown:
-----Click on the Resources tab from
the Network menu.
-----This section allows you to define internal services
securely.
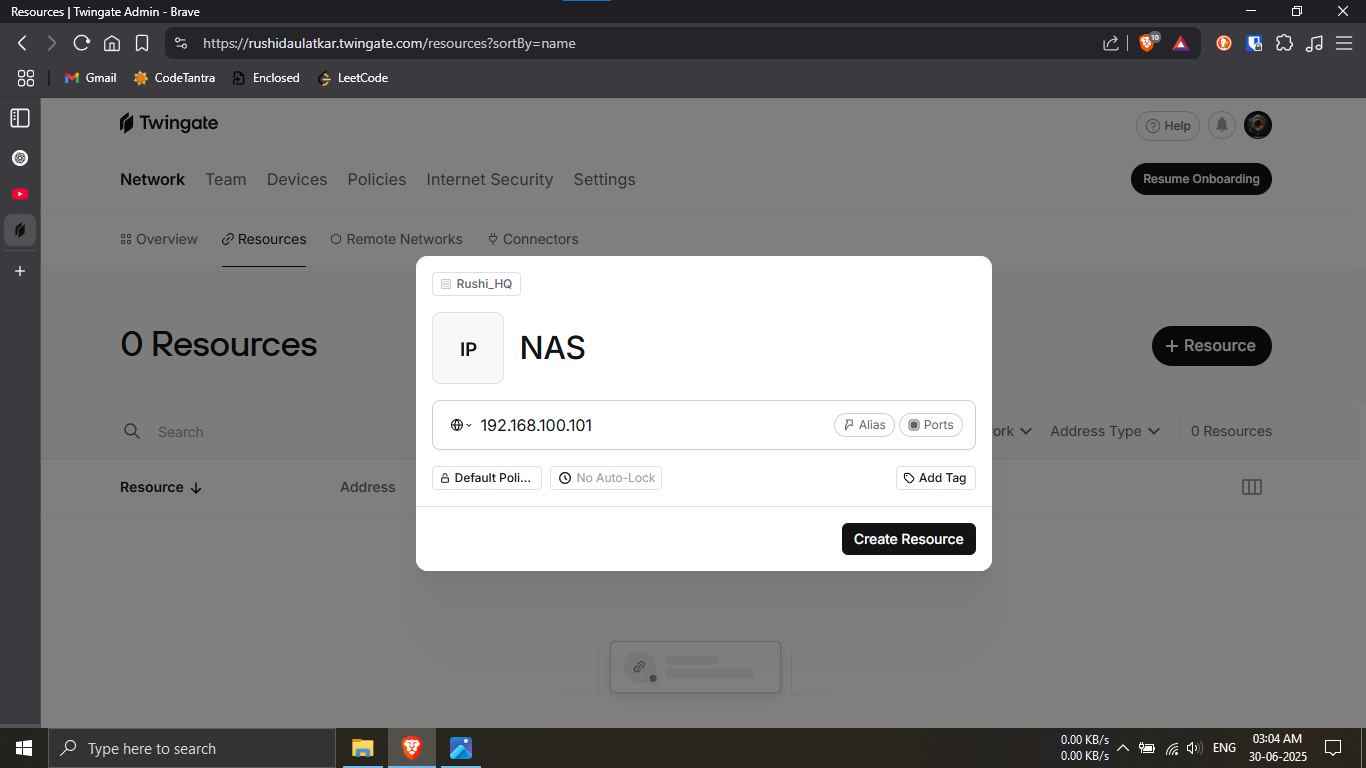
Step 29.3: Create a new protected resource.
🔹Breakdown:
-----Click on + Resource to add a new
service.
-----Enter a resource name (e.g., NAS) and its internal
IP address.
💡 This resource represents an internal system you want
to access securely.
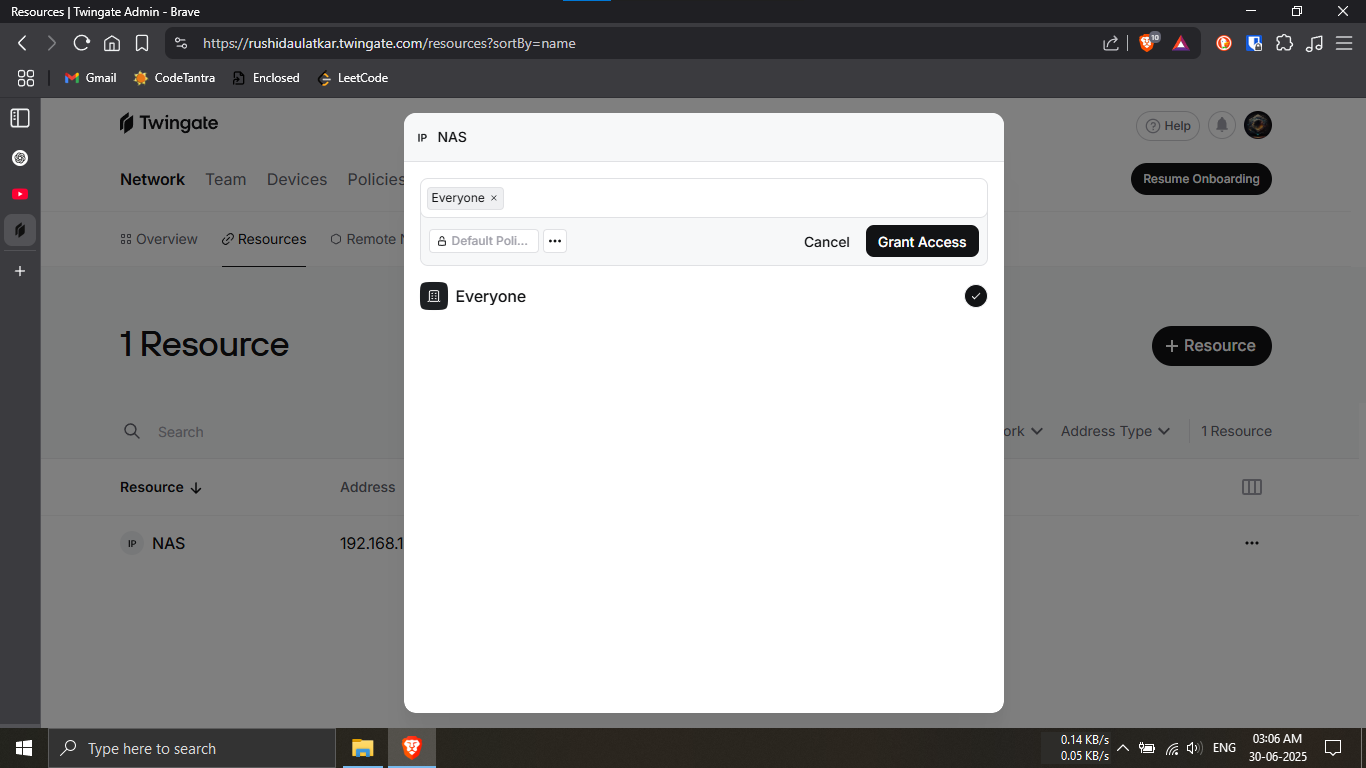
Step 29.4: Assign access permissions to the resource.
🔹Breakdown:
-----Select who can access the resource (e.g., Everyone
or specific users).
-----Click Grant Access to apply the
permissions.
🔐 Access control ensures only authorized users can
reach the resource.
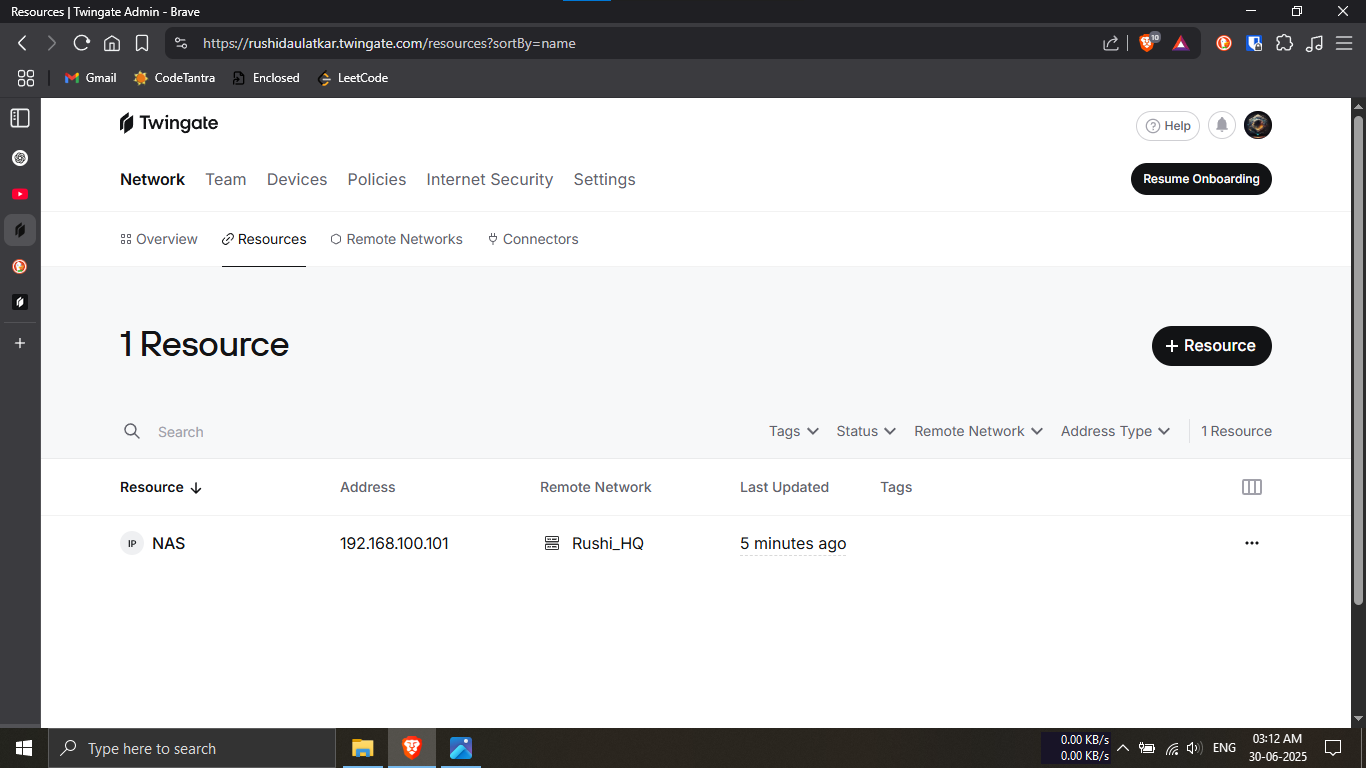
Step 29.5: Confirm the resource has been added
successfully.
🔹Breakdown:
-----Verify the resource appears in the Resources
list.
-----Ensure the correct IP address and remote network
are displayed.
✅ Your internal service is now securely accessible
through Twingate.
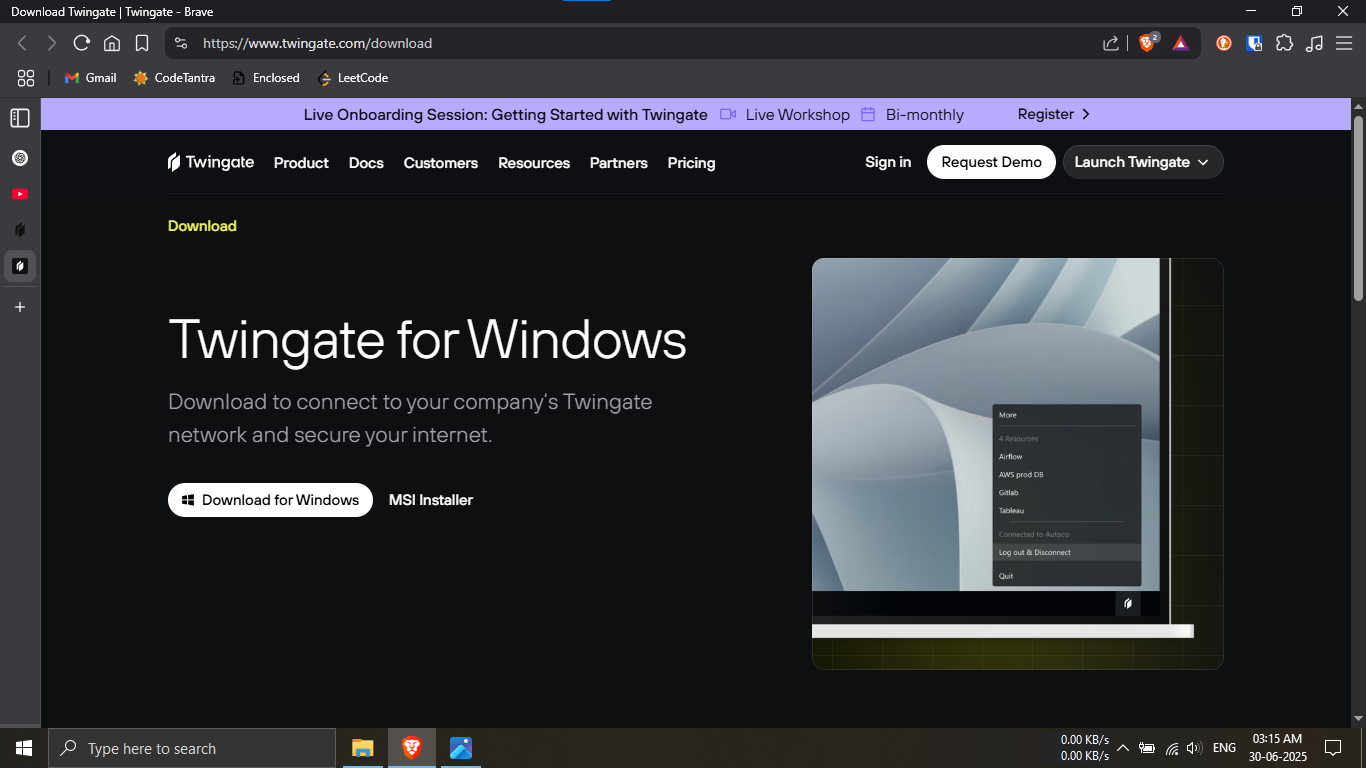
Step 30.1: Download the Twingate client for Windows.
🔹Breakdown:
-----Open a web browser and visit the official Twingate
download page.
-----Click on Download for Windows to
obtain the installer.
💡 This client is required to securely access protected
resources.
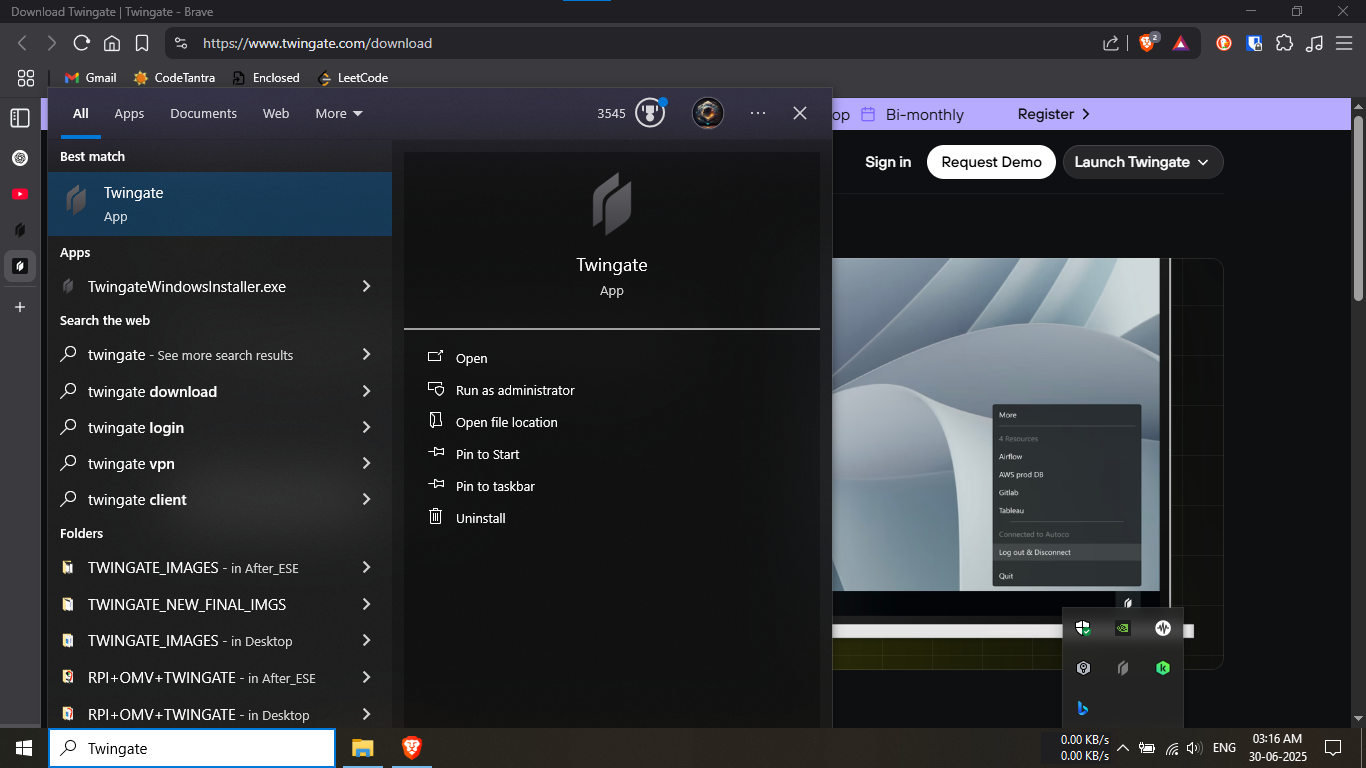
Step 30.2: Open the Twingate application on Windows.
🔹Breakdown:
-----Install the downloaded Twingate installer if not
already installed.
-----Search for Twingate in the Start
menu and open the app.
✅ The app icon confirms a successful installation.
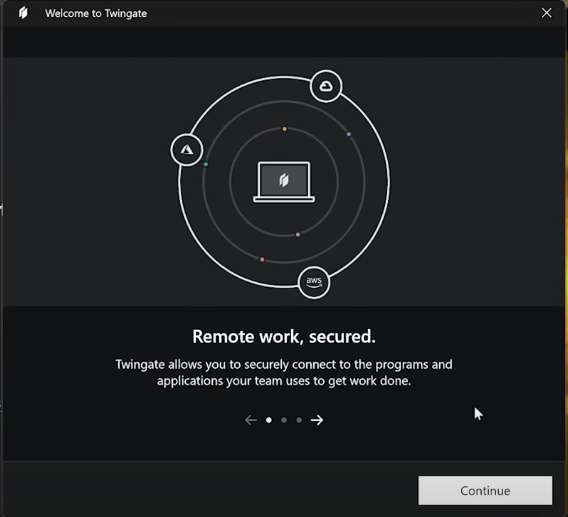
Step 30.3: Complete the initial welcome setup.
🔹Breakdown:
-----Review the welcome information displayed by
Twingate.
-----Click Continue to proceed with the
setup process.
💡 This screen provides a brief overview of how Twingate
works.
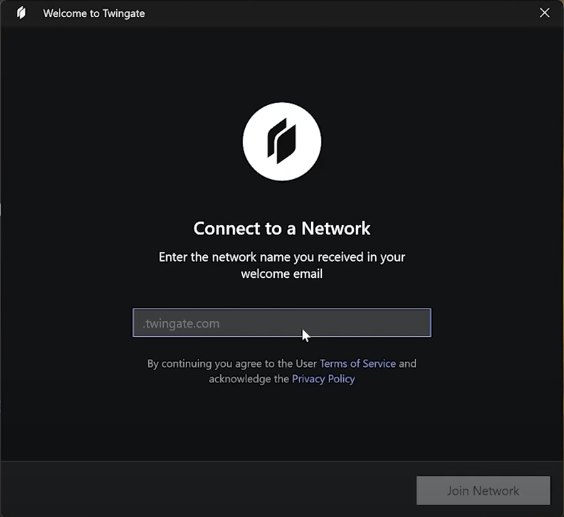
Step 30.4: Connect the client to your Twingate
network.
🔹Breakdown:
-----Enter your
Twingate network name provided in the
welcome email.
-----Click Join Network to continue.
🔐 Once connected, you can securely access assigned
resources.
PHASE_5_COMPLETE