Bake Your Raspberry Pi
This phase provides a hands-on walkthrough to bring your Raspberry Pi to life for the first time. You’ll prepare the SD card, flash the operating system, connect essential hardware, and perform the initial boot.
By the end of this phase, your Raspberry Pi will be powered on,
running a fresh OS, and ready for network configuration.
👇👇👇👇👇
PHASE_1_BAKE_YOUR_RPI
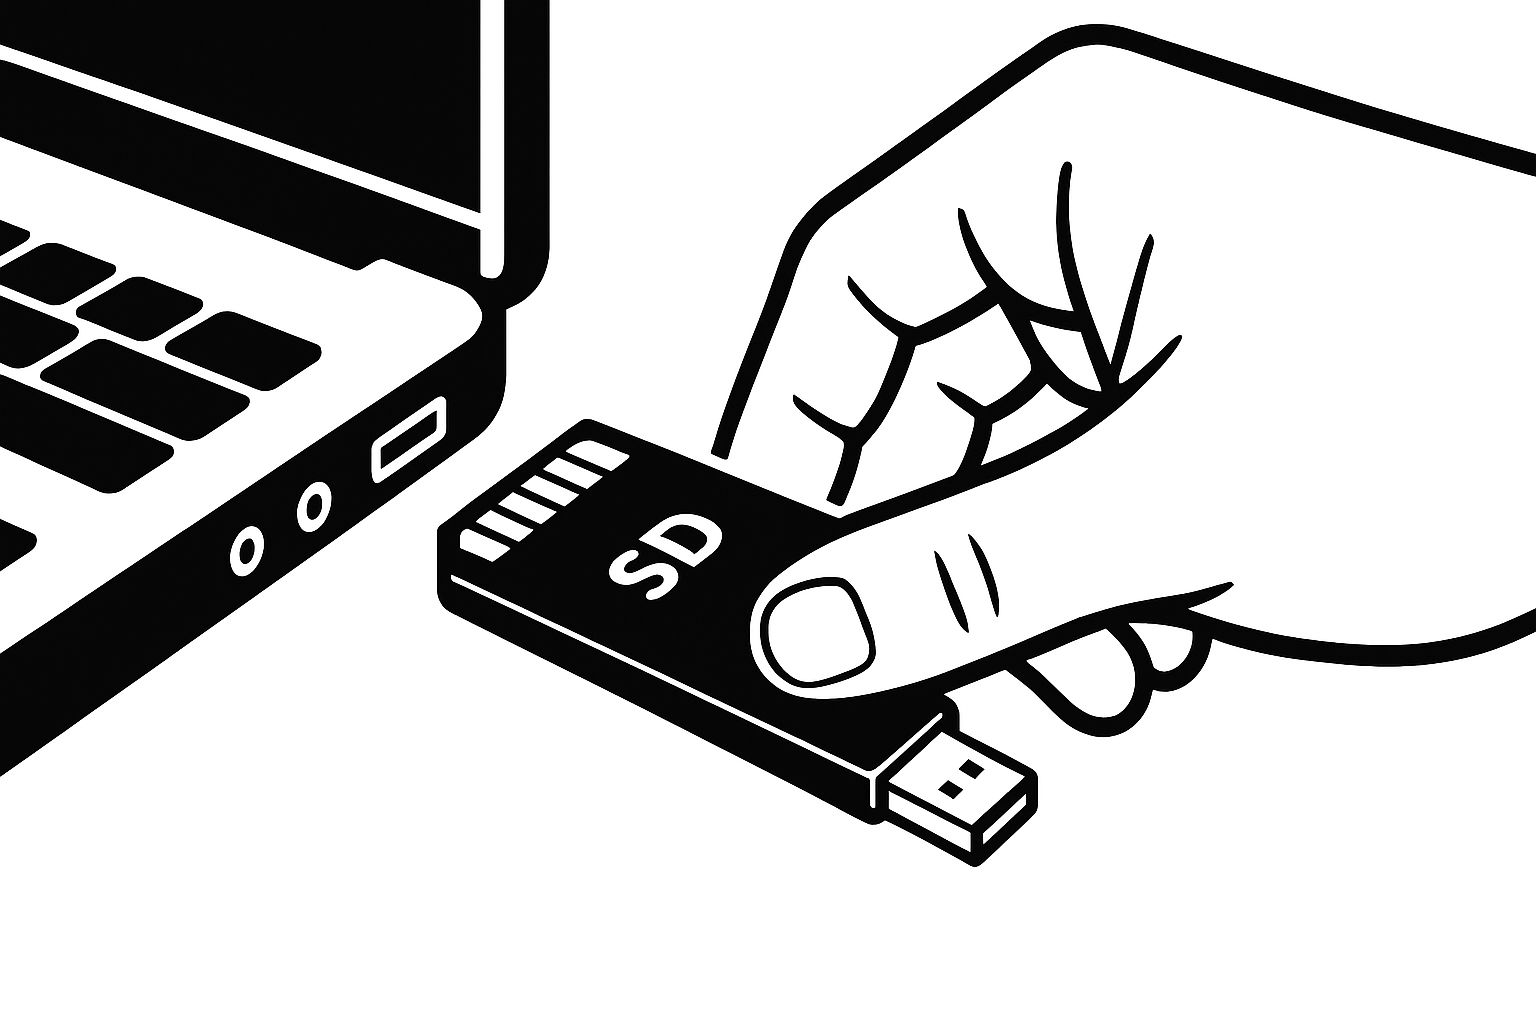
Step 0: Prepare SD Card.
🔹Breakdown:
-----Insert a blank or preformatted SD card into your
computer.
-----Ensure it's recognized and has enough space for the OS
image.
-----Use high-quality SD cards (8GB+ recommended).
💡 This SD card will hold the operating system for your
Raspberry Pi! 💾
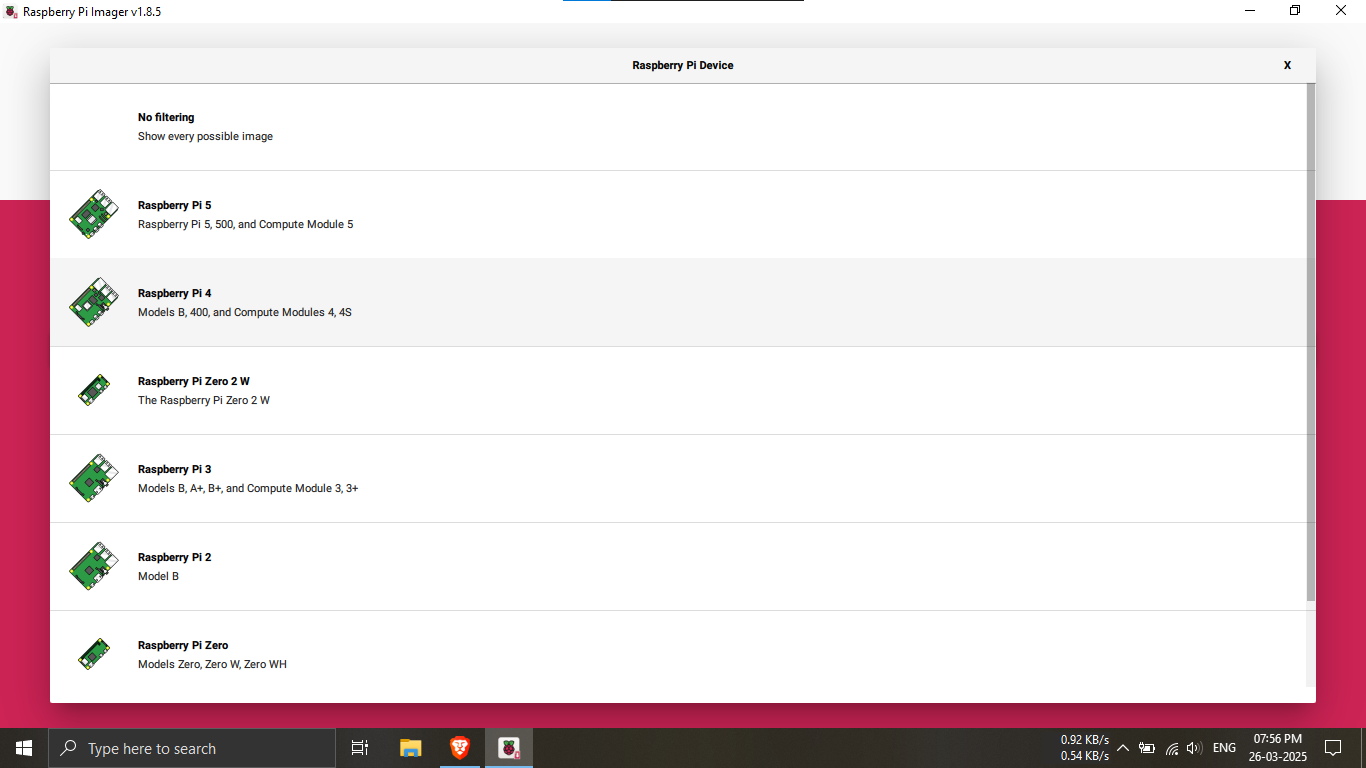
Step 1: Choose Raspberry Pi 4 (RPI4).
🔹Breakdown:
-----Open Raspberry Pi Imager or similar tool.
-----Select your device as Raspberry Pi 4.
💡 Choosing the right model ensures compatibility with
the OS! 🖥️⚙️
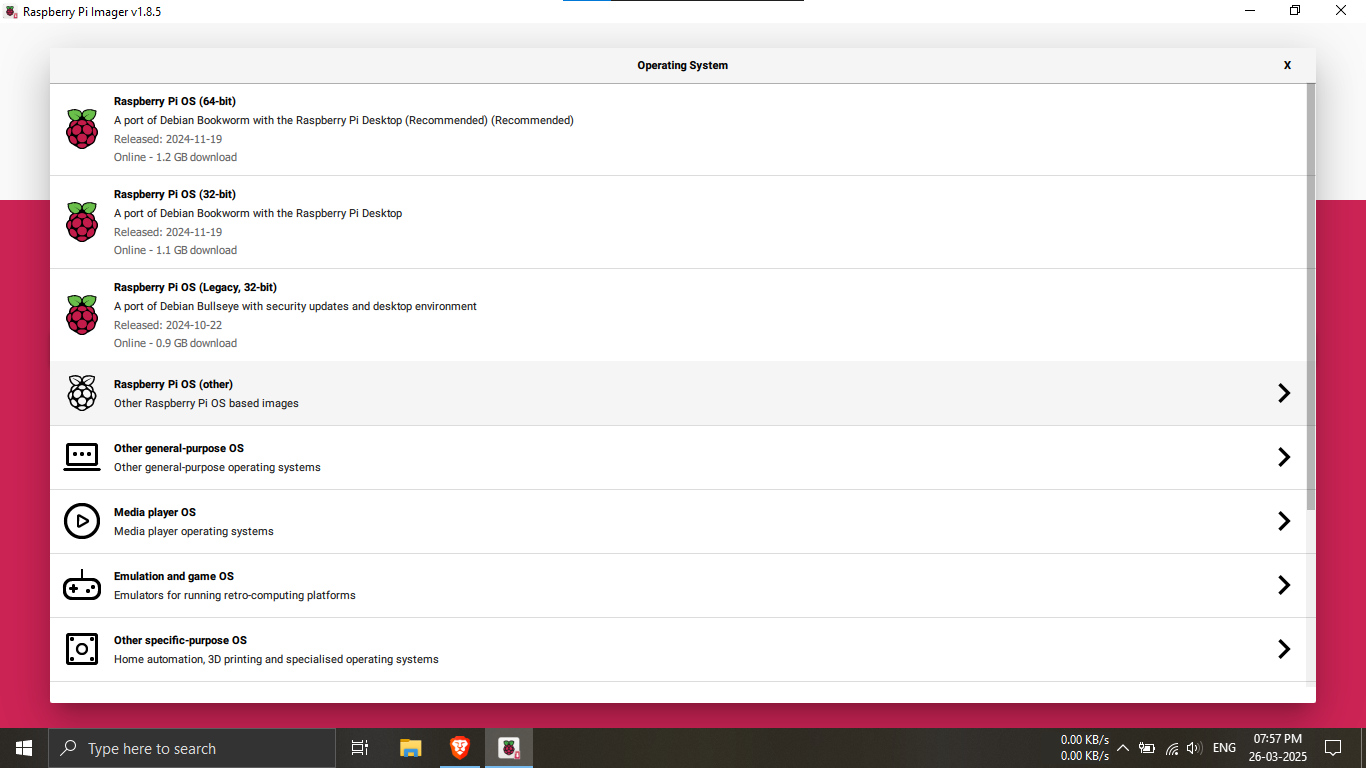
Step 2.1: In the operating system category.
🔹Breakdown:
-----Go to the “Other OS” section to see available
options.
💡 Explore alternate OS choices for custom use cases!
🧠🛠️
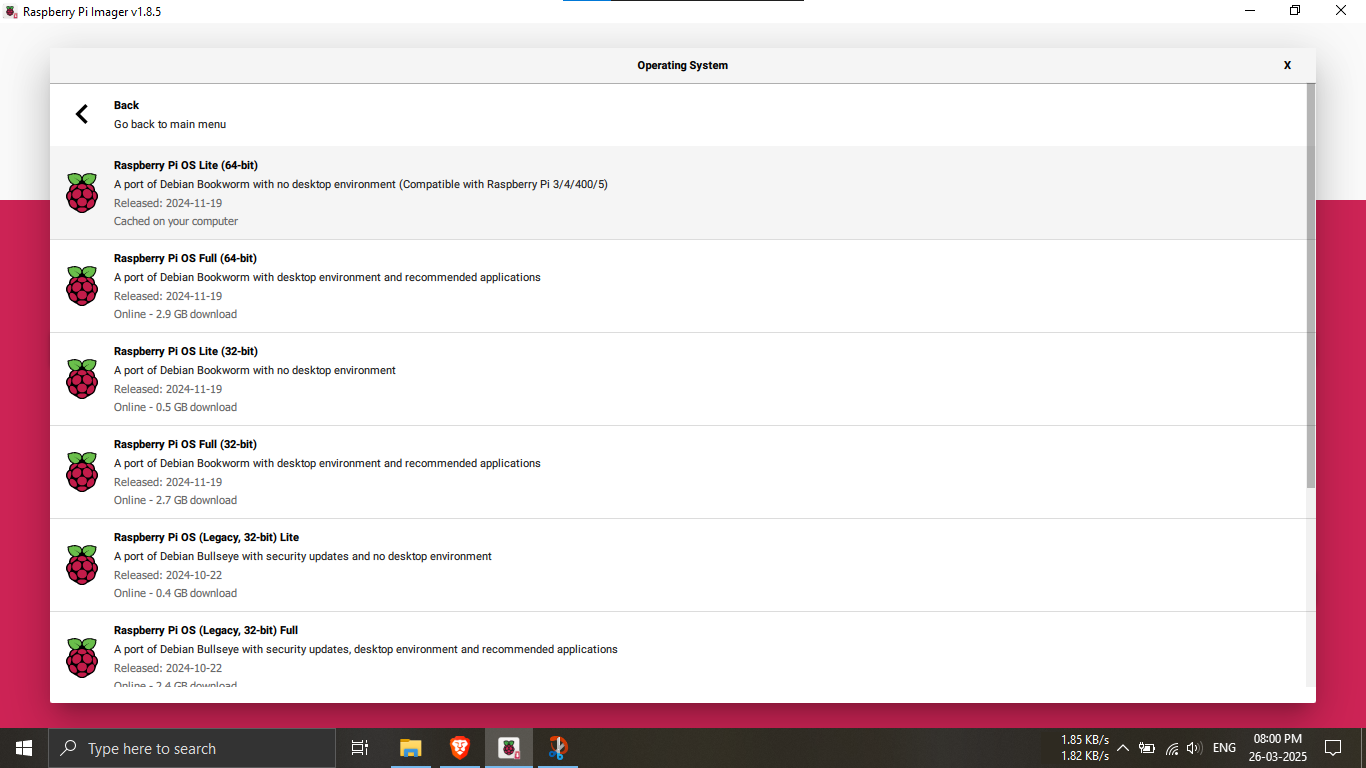
Step 2.2: Select "RPI OS Live 64-bit" from the list.
🔹Breakdown:
-----Ensure 64-bit support for performance.
-----It will download (automatically) if not
available.
💡 64-bit systems offer better memory handling and
performance! 🚀📈
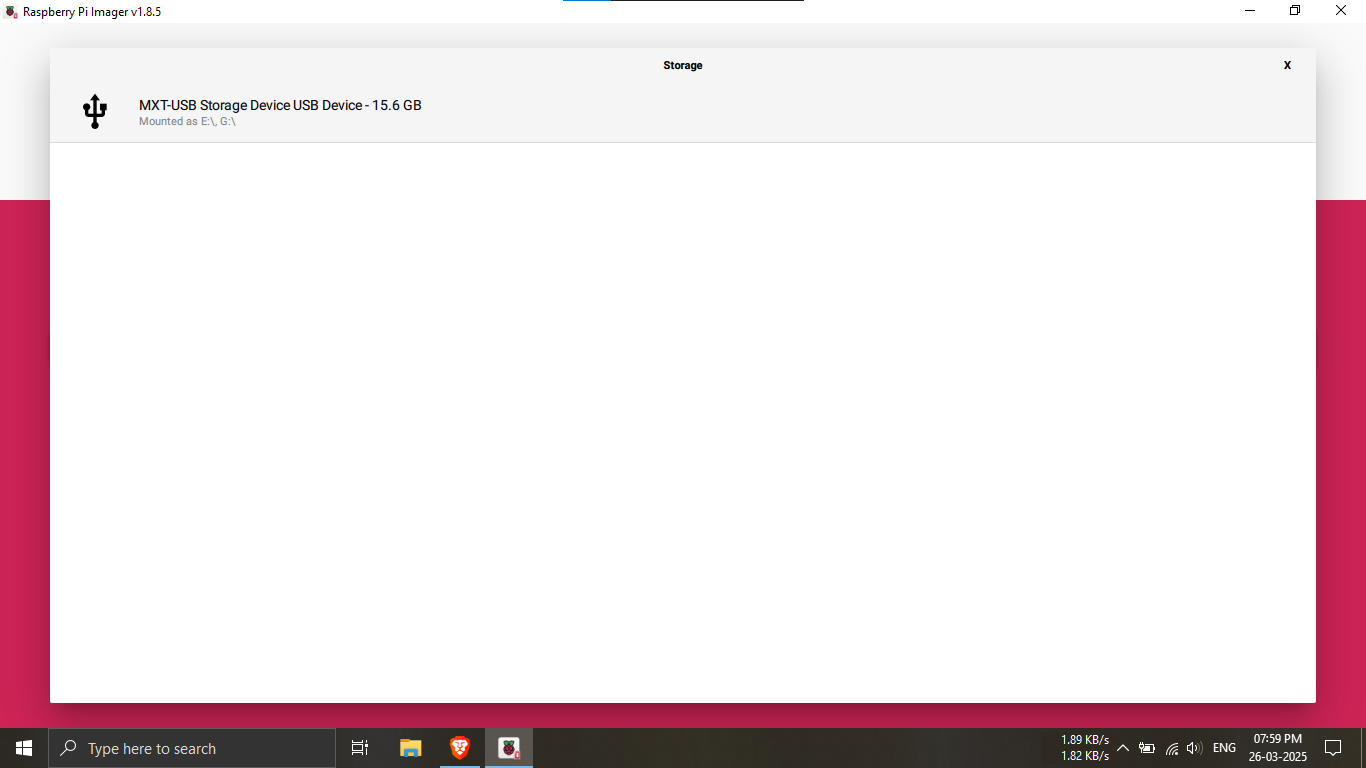
Step 3: Choose the storage drive (SD card).
🔹Breakdown:
-----Select the SD card you inserted in Step 0.
💡 Double-check the selected storage to avoid
overwriting important data! 📀⚠️
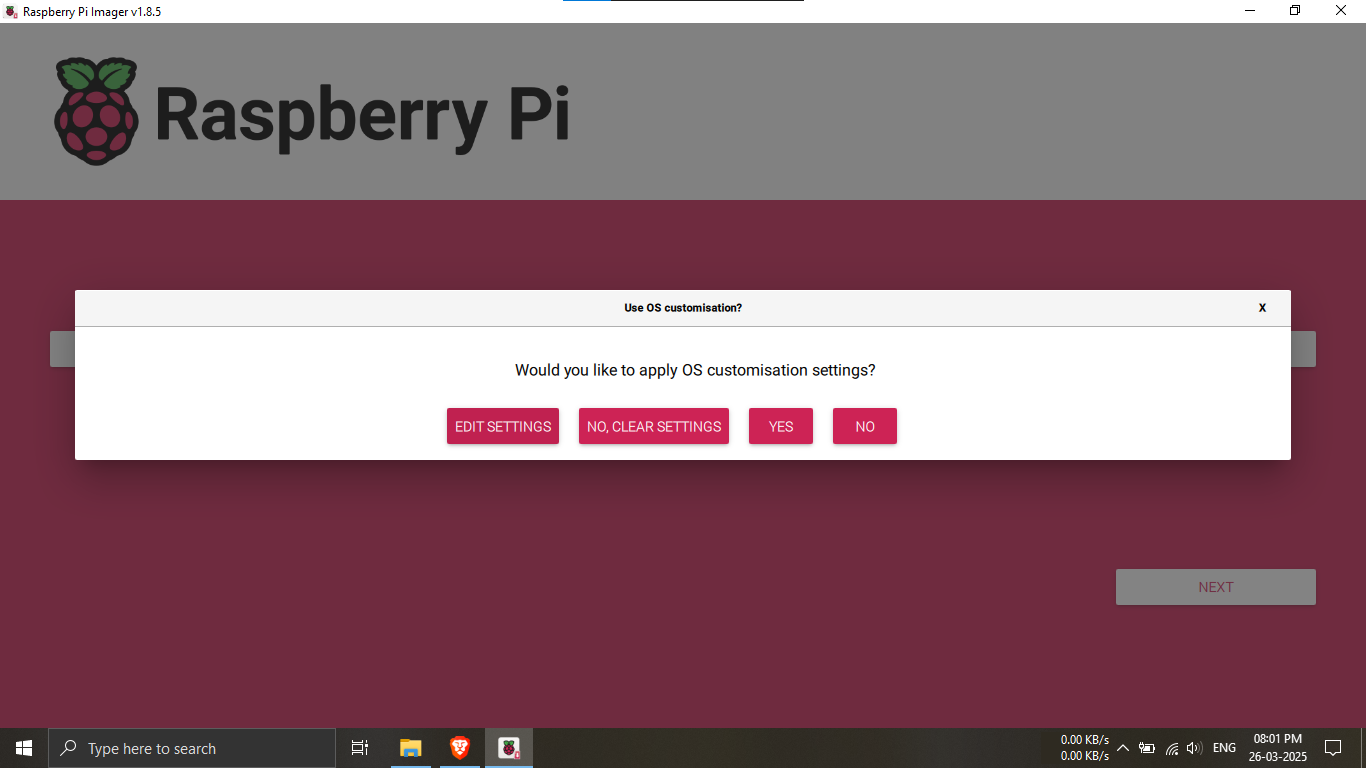
Step 4: Click "Edit Settings".
🔹Breakdown:
-----Here you will set your hostname, username,
password, and enable SSH.
💡 Pre-configure your Pi to speed up setup after
flashing! 🧩🔐
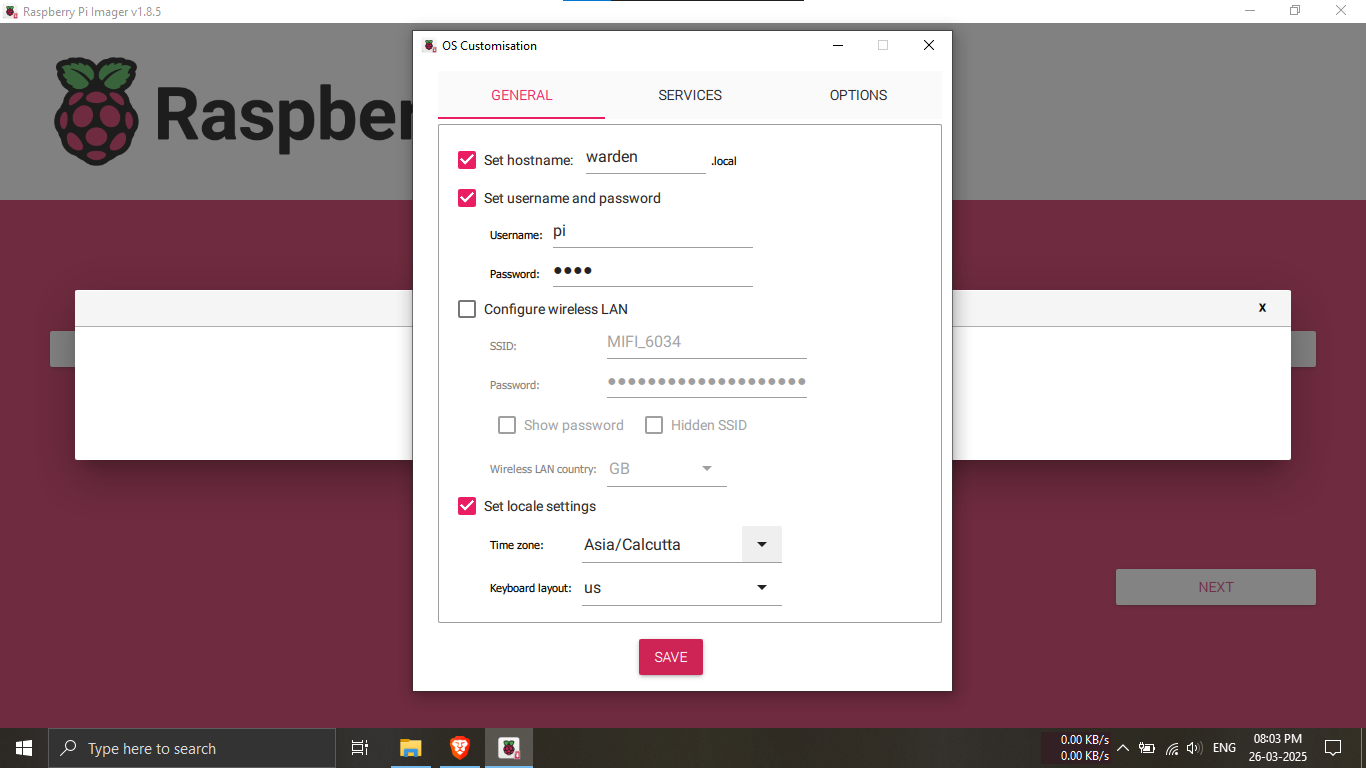
Step 5.1: Set hostname, username, and password.
🔹Breakdown:
-----Example Hostname: warden
-----Username: pi
-----Password: root
💡 Choose secure credentials and memorable hostnames!
🛡️🧠
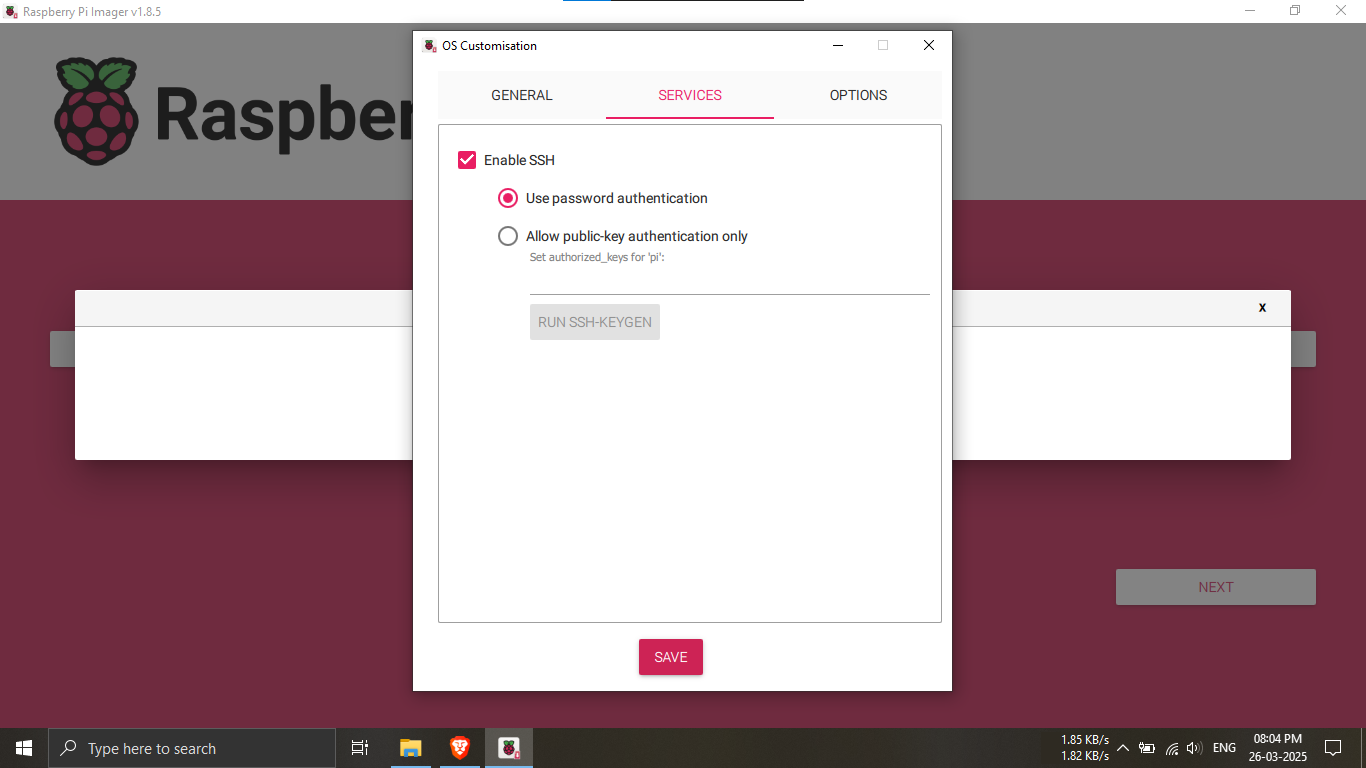
Step 5.2: Enable SSH access.
🔹Breakdown:
-----Check the box to enable SSH for remote access.
💡 SSH allows you to control your Pi from any computer!
📡💻
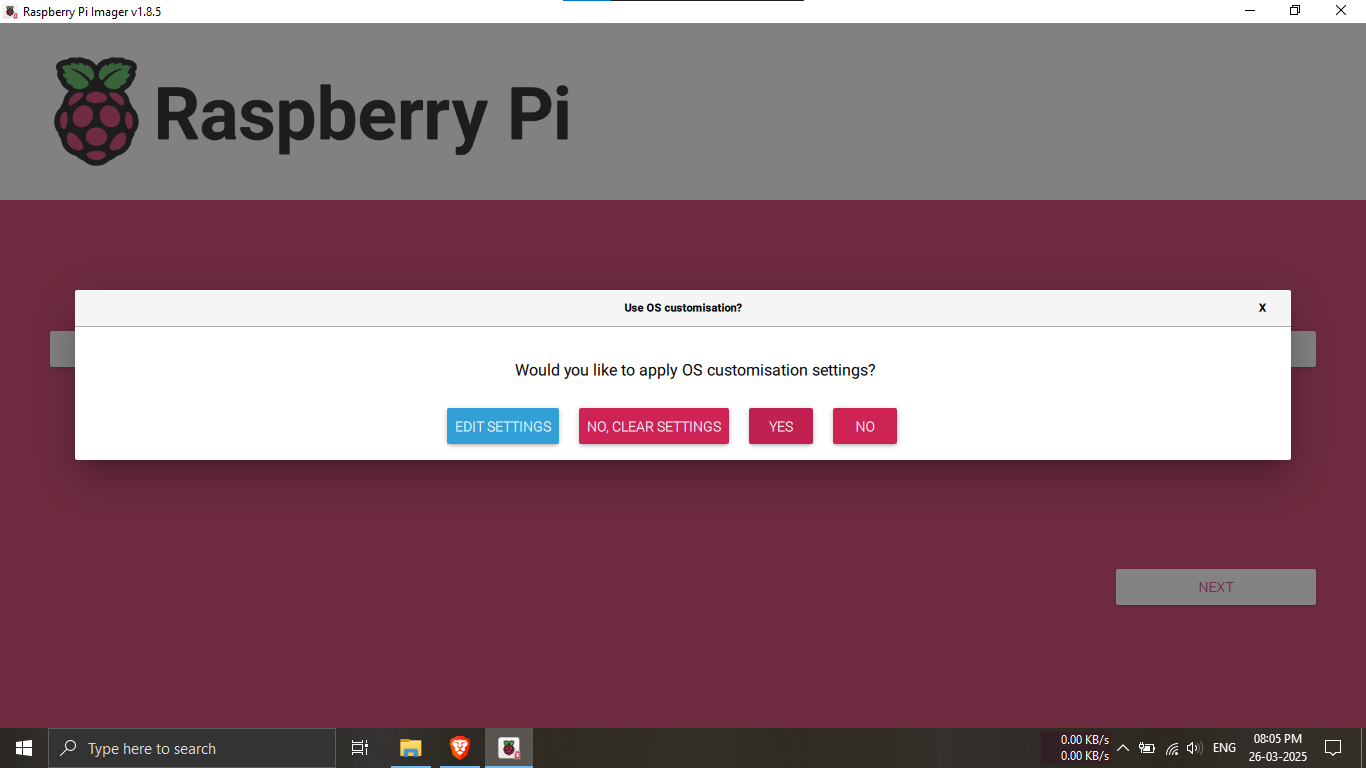
Step 6: Click "Yes" to confirm settings.
🔹Breakdown:
----- Note down your Configs if required
💡 Make sure all configurations are correct before proceeding! ✅📋
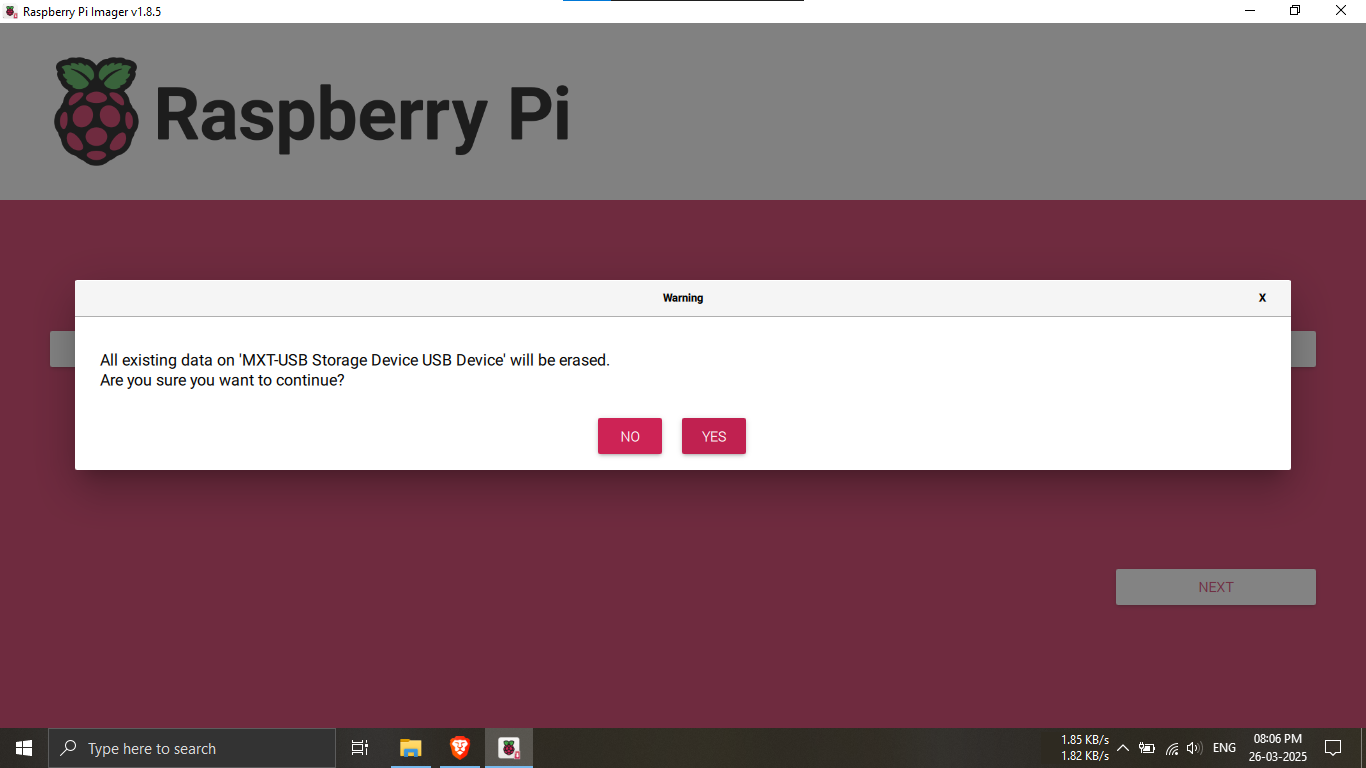
Step 7: Clear all SD card data.
🔹Breakdown:
-----Click "Yes".
-----This will erase all data on the SD card before
writing the OS.
⚠️ Backup any important files first! (If any)💣📤
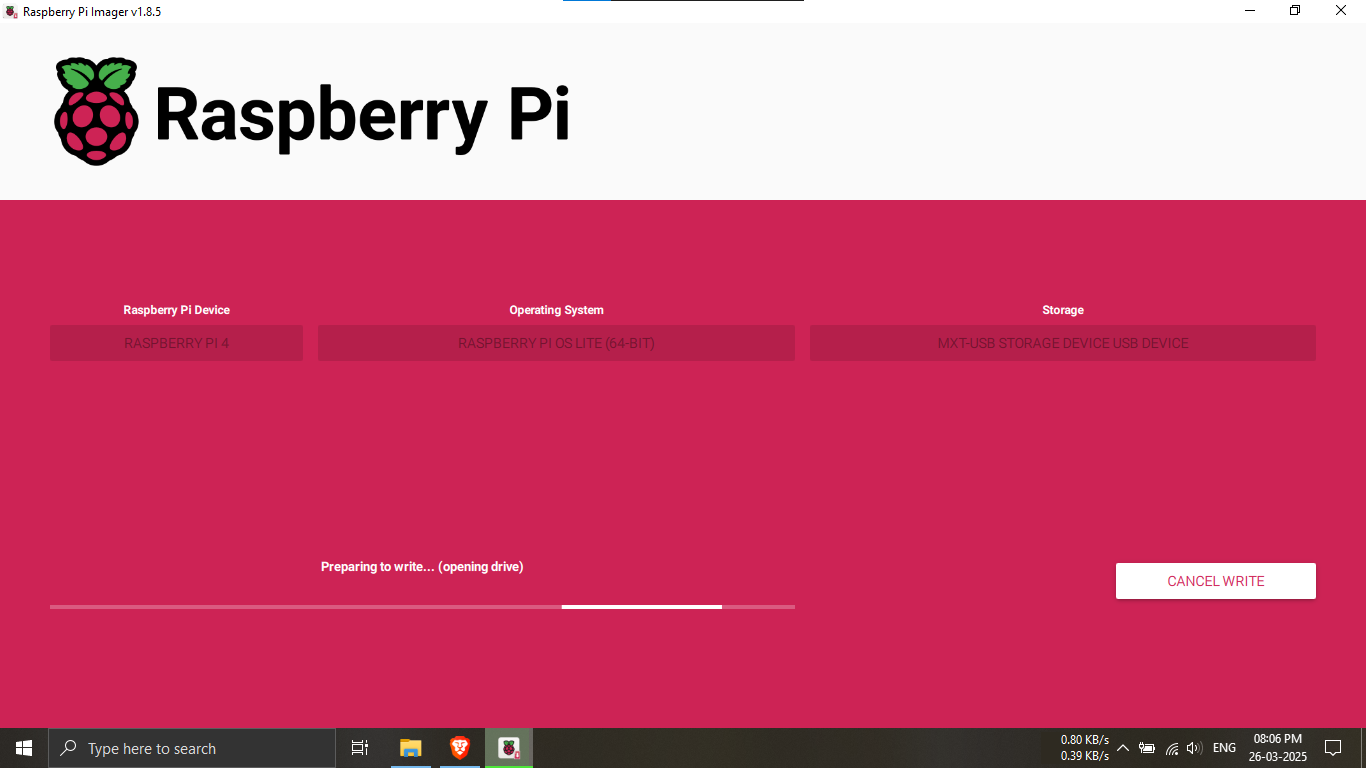
Step 8.1: Preparing the SD card drive for writing.
🔹Breakdown:
-----The imaging tool opens and mounts the SD card.
-----Checks for read/write access and space.
💡 Avoid using other applications during this step to
prevent conflicts! 🔄📁

Step 8.2: Writing the OS image to the SD card.
🔹Breakdown:
-----The selected OS is now being written
sector-by-sector.
-----This may take several minutes.
💡 Be patient — do not remove the SD card or power off!
⏳📝
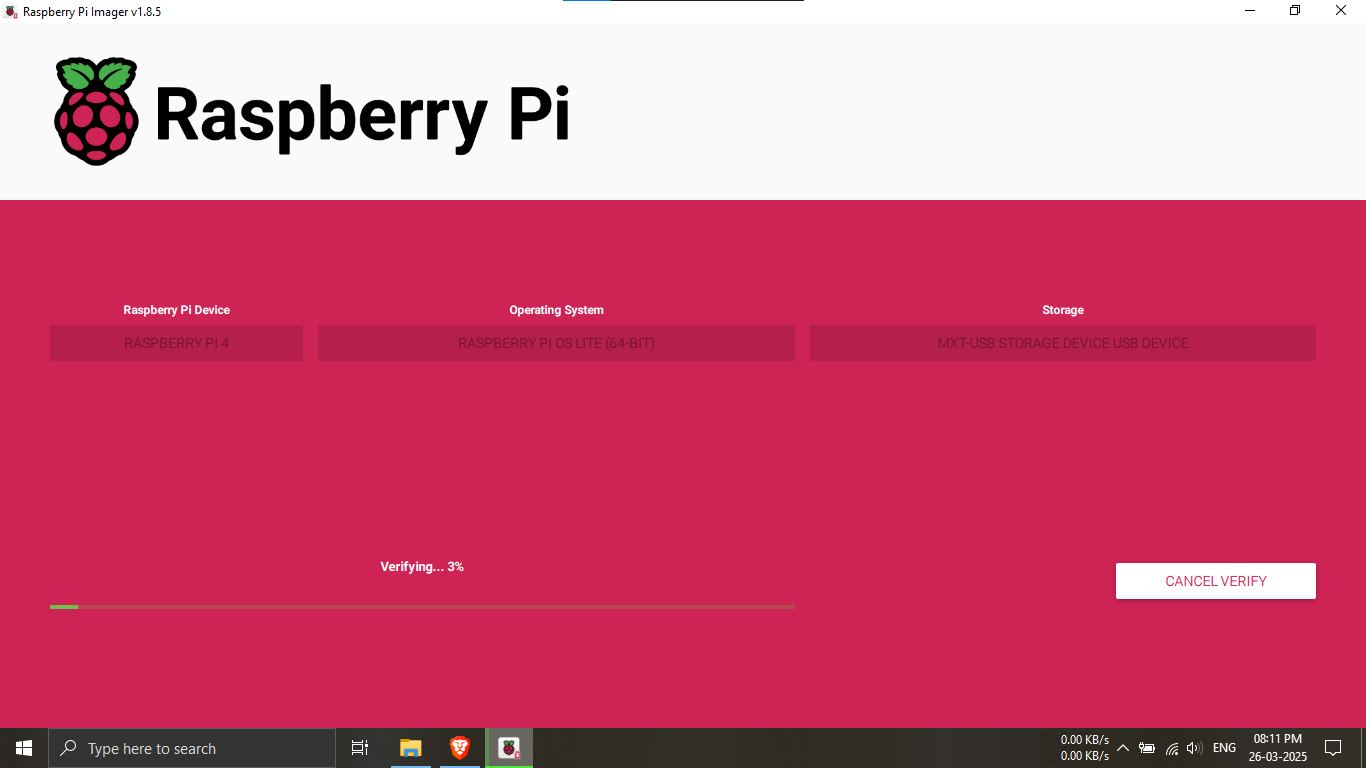
Step 8.3: Verifying the written image.
🔹Breakdown:
-----The imager reads back the data written to ensure
integrity.
-----Checks for errors or corruption.
💡 This helps prevent boot failures caused by faulty
writes! 🧪✅
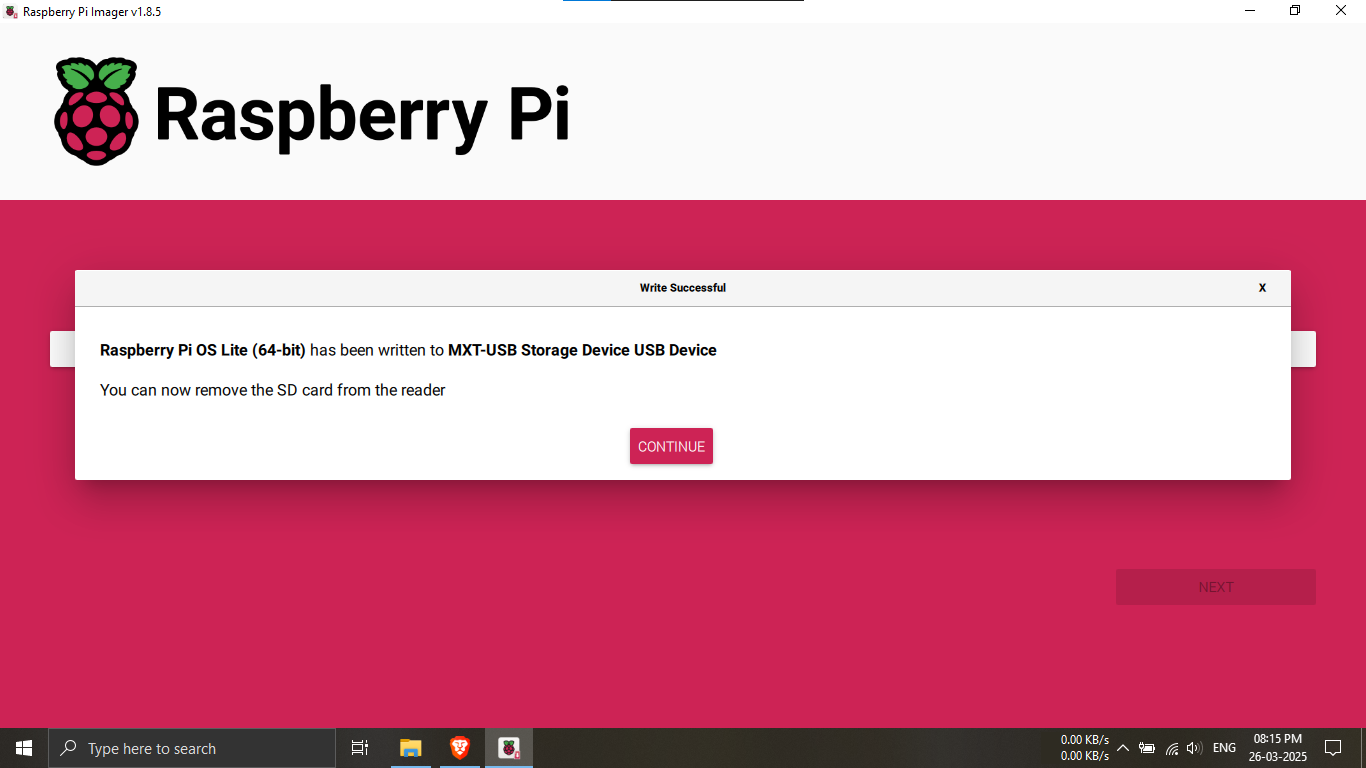
Step 8.4: Image writing completed successfully.
🔹Breakdown:
-----You’ll receive a success message.
-----The SD card is now ready for use in Raspberry
Pi.
💡 Safely eject the SD card to avoid file system issues!
🟢📤
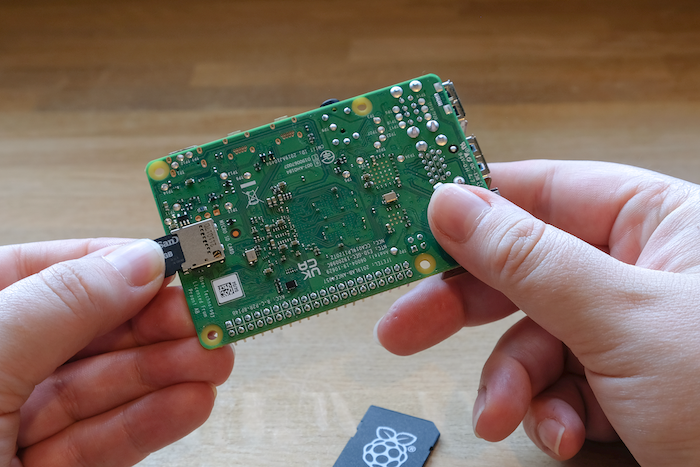
Step 9.1: Insert the prepared SD card into your
Raspberry Pi.
🔹Breakdown:
-----Make sure the card is securely seated in the
microSD slot.
-----Ensure power is disconnected before inserting.
💡 Improper insertion can cause boot issues —
double-check it’s secure! 🧩💳
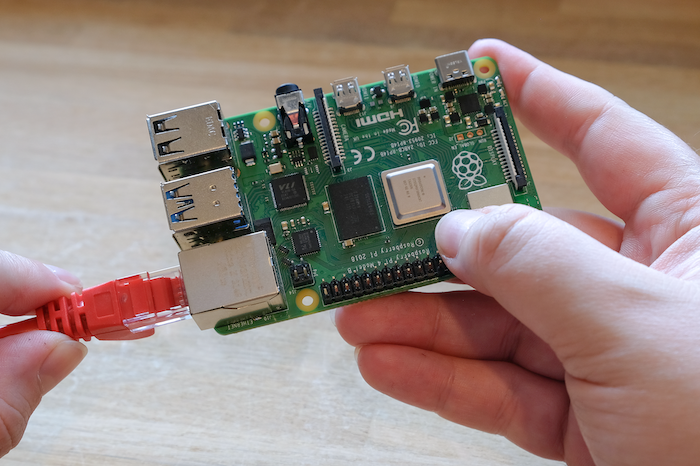
Step 9.2: Connect your Raspberry Pi to a network.
🔹Breakdown:
-----Plug in an Ethernet cable for a stable
connection.
-----Alternatively, use Wi-Fi (if) pre-configured in
imager settings.
💡 A reliable connection is needed for SSH and updates.
🌐🔗
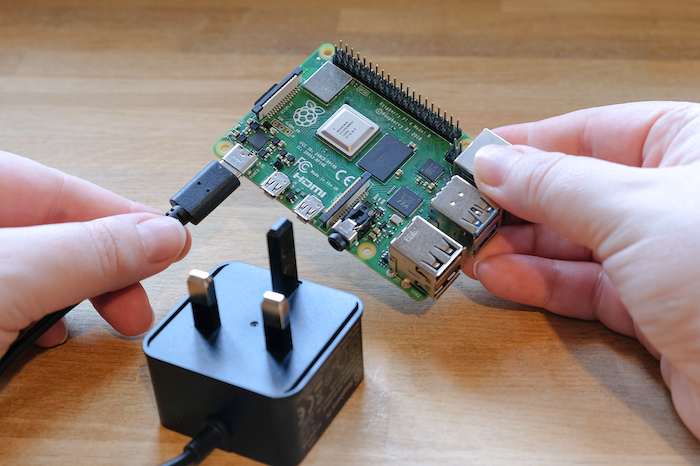
Step 9.3: Connect power to the Raspberry Pi to boot.
🔹Breakdown:
-----Use a 5V 3A power supply via USB-C (for RPI4).
-----Boot process begins and initial configuration is
applied.
💡 The first boot may take several minutes — don’t
interrupt it! ⚙️🟢
PHASE_1_COMPLETE